jebarne
Distinguished Member
- Joined
- Nov 11, 2012
- Messages
- 1,767
- Reaction score
- 1,702
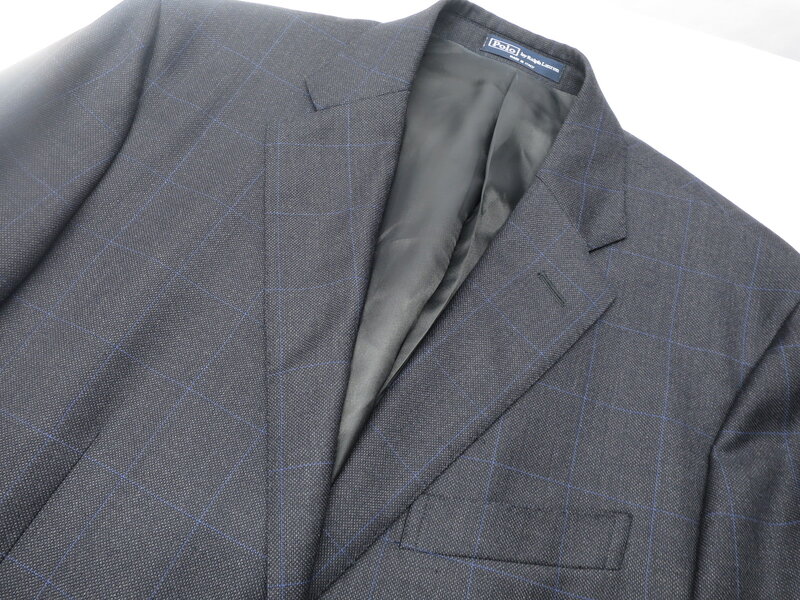
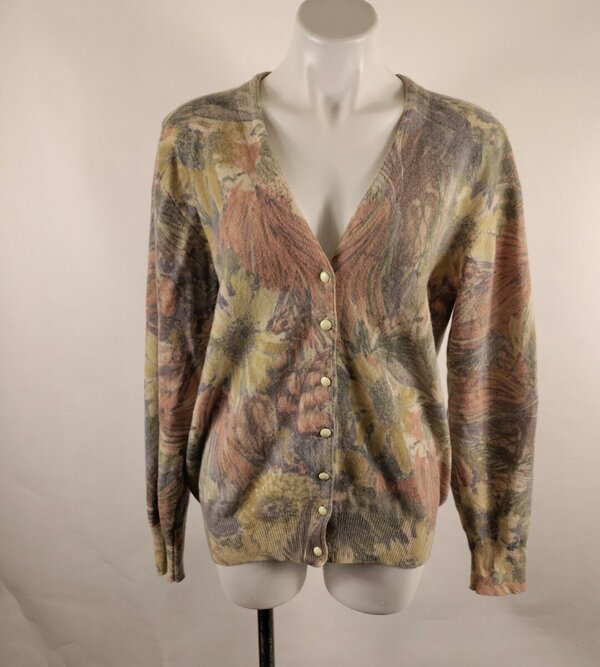
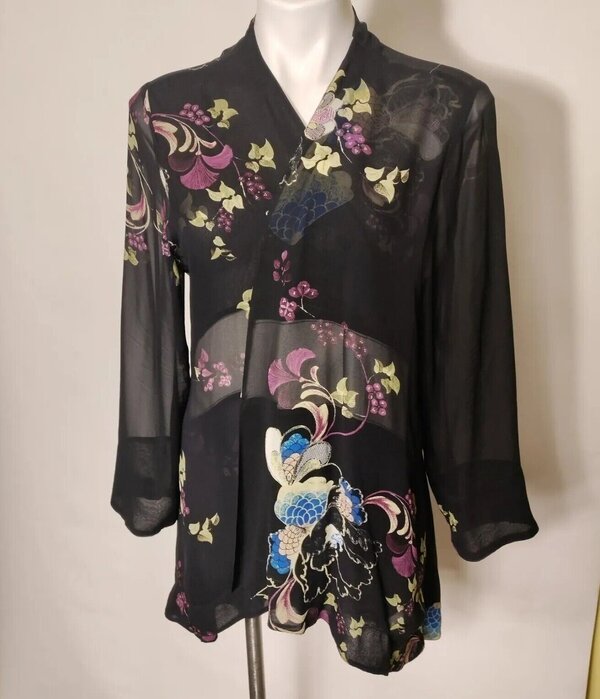
the background and work surface that Wes uses IS A gray card. on the munsell color standard, its a Nuetral gray 8. That particular system is used for color matching applications.What I can't figure is how to shoot navy or black things against a white background without really ramping up exposure, which kills any lighter colors. A black suit with good detail is always paired with a horribly blown out white shirt for me. I can fix it in post, but I don't like adding extra steps and time towards correcting photos. Especially when each shot is a subjective fiddling with levels or curves.
This for instance:

This was a couple months ago, so the white balance is off, and goddamnit there's **** on the lens too, but it's a good example. I want to be able to have this definition in the jacket but also not completely lose my shirt. Oh, and I want to do this without going the HDR route.
edit: oh holy ****, THAT'S the purpose of a grey card!
edit2: damnit, actually no that won't give me a higher range
Wes thrifted an older model, but you can check out the spec's to the current models here: http://gtilite.com/cvx-color-viewing-station.htm
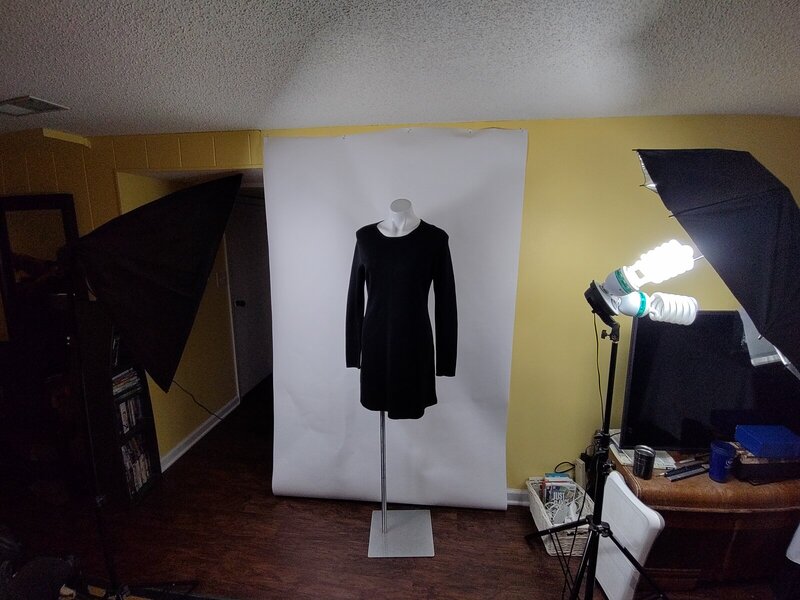
when I was first thinking about listing, I put together a table top photo station made from foam core board and clip lights. I actually made 2 of them. I painted the first on munsell neutral gray 8 and the 2nd I did a white that is used for painted projections screens. Both produced the same result, or essentially so. This befuddled me because I wanted the stark white to disappear the background. Trying to answer this question, I found out that DSLR's, at least the consumer versions, process white and NG8 as the same regardless of what you've chosen. Since there is more variability in whites than most people see, MG8 is a way to standardize white balance.
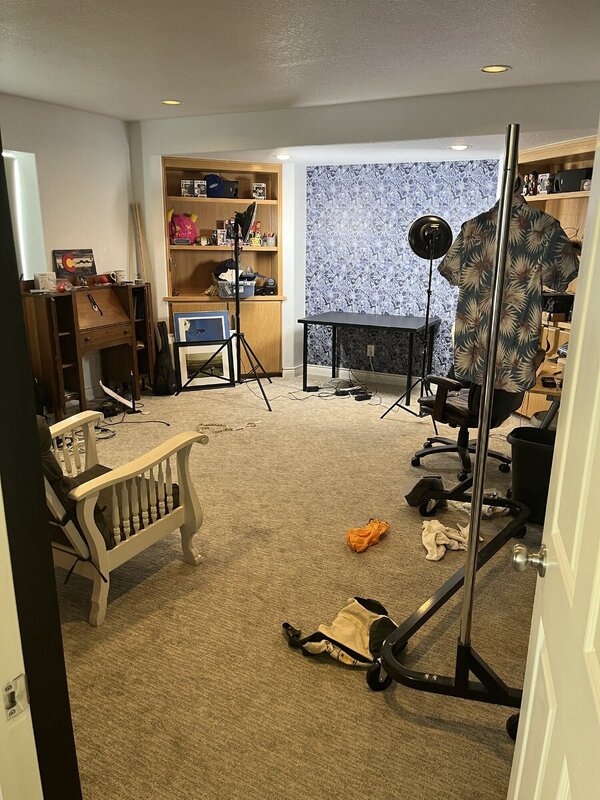
When I decided I wanted to try to see if I could find stuff and sell it, I wanted to have a compact system. In fact, I designed a piece of furniture that would compress the entire photo set up into about an 18"x48" foot print. Everything folded up and out. before I invested a ton of time building that, I wanted to see if I could duplicate the lighting and get decent results. (you can probably tell, the fun of this for me is figuring stuff out.) On the gtlite website, I saw a standalone over head light. http://gtilite.com/vertical-wall-viewing.html. This seemed like a good solution for keeping your set up compact, so that's essentially what I did. Theirs started at $2000 for the overhead fixture with bulbs. I bought a 4 foot troffer fixture with 4 bulbs and a 2 bulb light at lowe's and 6500K bulbs. I built a wood frame and mounted it. results were pretty good. I ended up with a 6 bulb system for about $100. Each of the lamps has 2700 lumens so over 16000 lumens overhead. and it doubles as a tanning bed.

I've since taken the 2 bulb fixture and aimed it at the backdrop, changed diffusers a couple of times.....I almost never have to fix color now.
I'm still dicking around with diffusing the light because I have that same issue of washing out the whites when capturing dark items.
There are so many variables from system to system. its hard to copy. Wes actually sent me a couple of his photos when I was testing my system. I wanted to check the metadata and see how his camera was set up for his shots. I manually matched his settings, ended up with a very good result, but with harsher contrast. Is it the Nikon vs Canon? is it the diffuser his system includes? is it the gray background? Is it just the innate talent of the shooter?
I don't know, but he got me close enough that I was comfortable with starting a store.


")
 You can help me set up my eBay room and get a free place to stay in Nashville.