• Hi, I am the owner and main administrator of Styleforum. If you find the forum useful and fun, please help support it by buying through the posted links on the forum. Our main, very popular sales thread, where the latest and best sales are listed, are posted HERE

    Purchases made through some of our links earns a commission for the forum and allows us to do the work of maintaining and improving it. Finally, thanks for being a part of this community. We realize that there are many choices today on the internet, and we have all of you to thank for making Styleforum the foremost destination for discussions of menswear.
  • This site contains affiliate links for which Styleforum may be compensated.
  • STYLE. COMMUNITY. GREAT CLOTHING.

    Bored of counting likes on social networks? At Styleforum, you’ll find rousing discussions that go beyond strings of emojis.

    Click Here to join Styleforum's thousands of style enthusiasts today!

    Styleforum is supported in part by commission earning affiliate links sitewide. Please support us by using them. You may learn more here.

Shoe Antiquing

Gus

Stylish Dinosaur
Dubiously Honored
Supporting Member
Joined
Sep 18, 2007
Messages
18,580
Reaction score
8,077
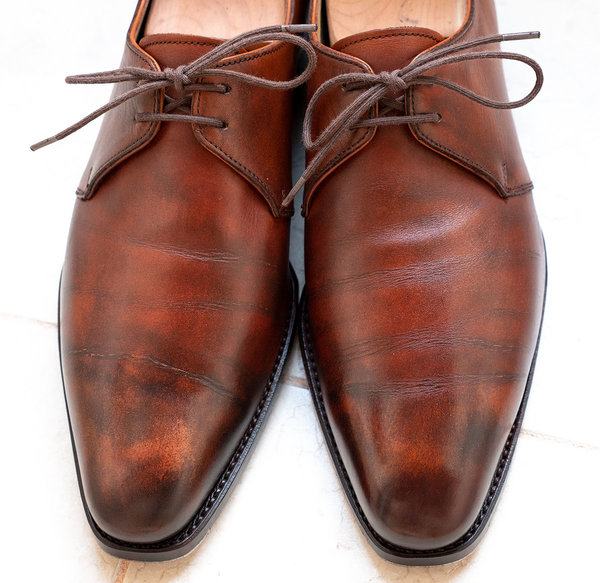
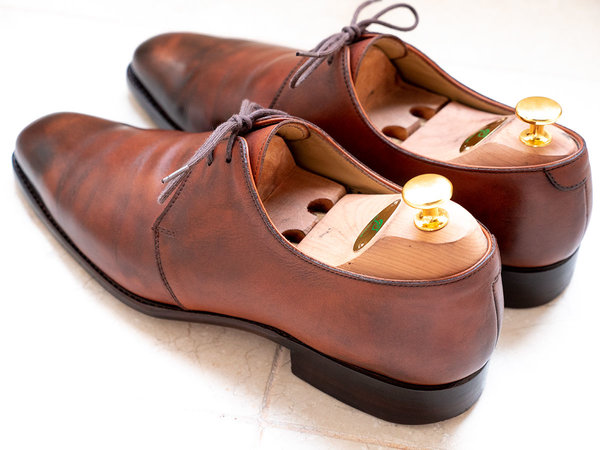
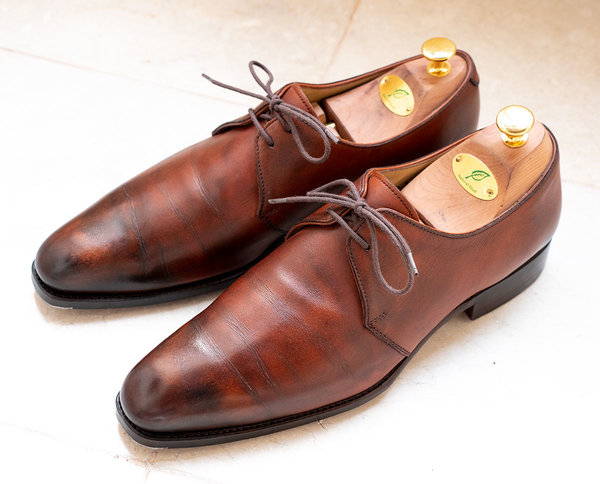
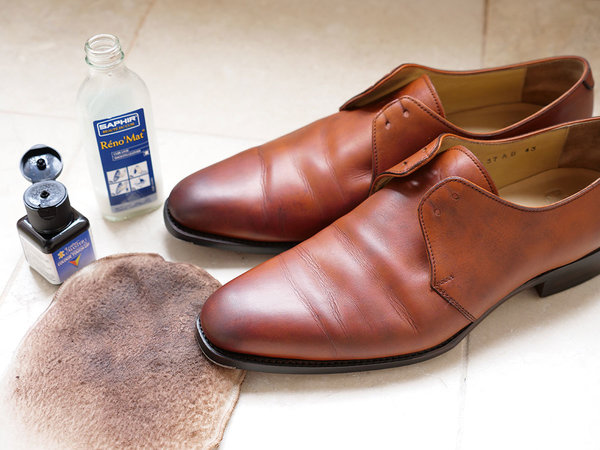
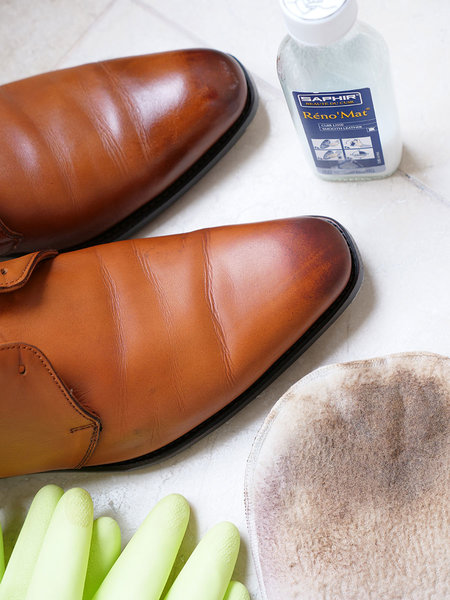
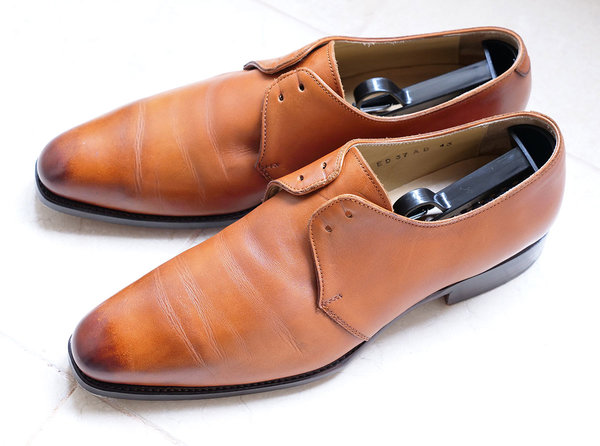
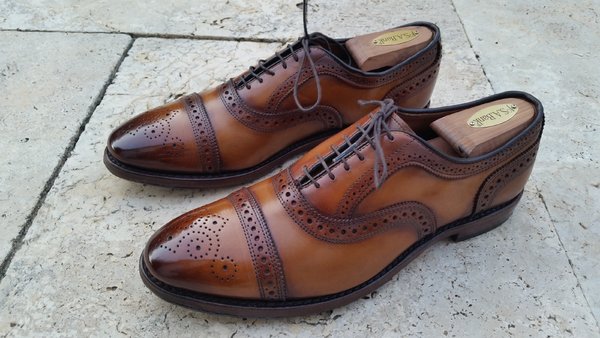
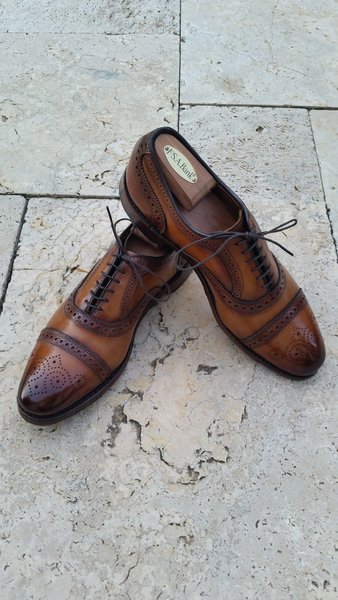
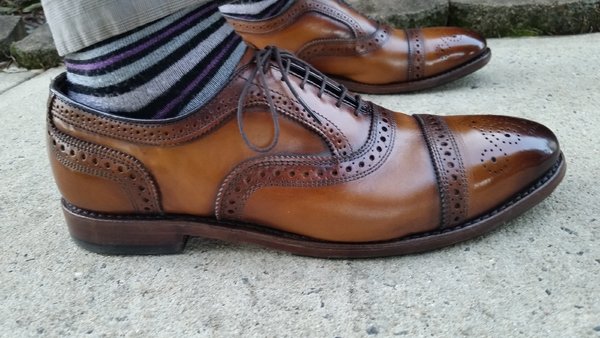
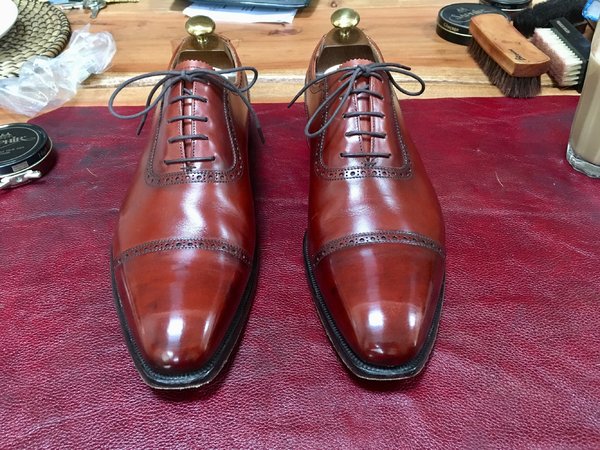
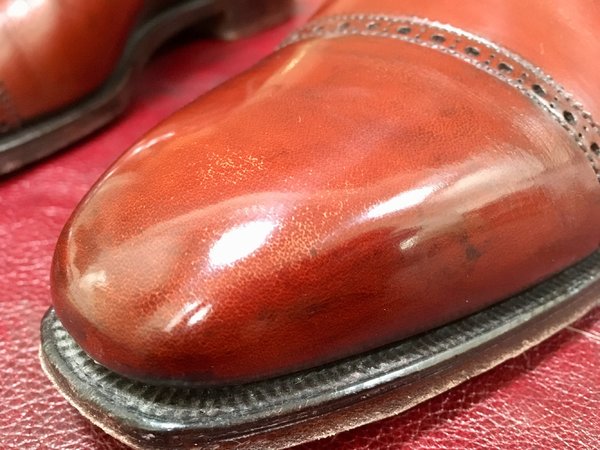
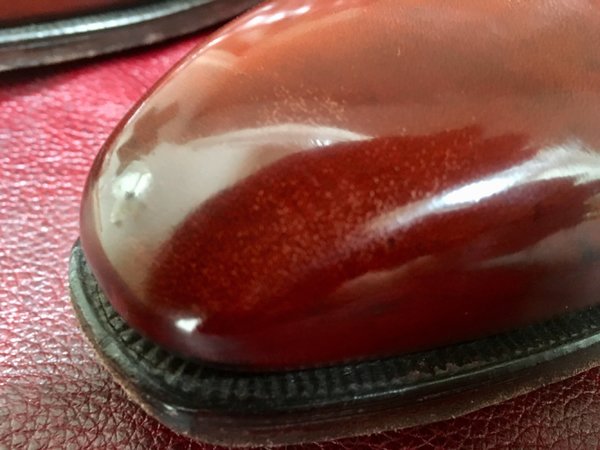
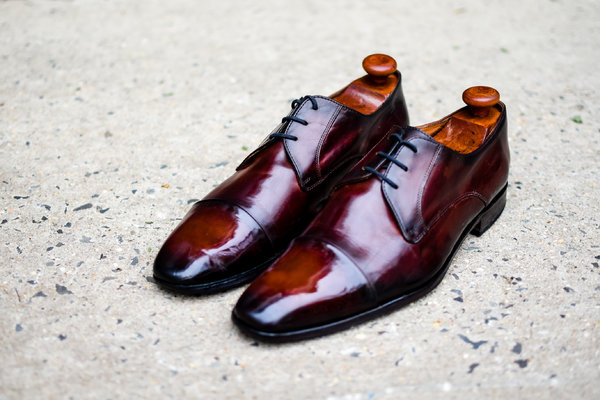
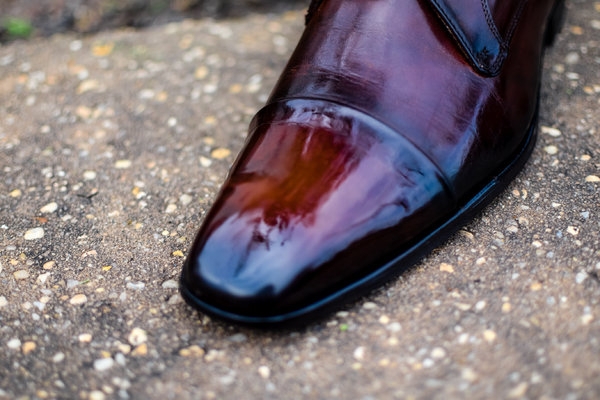
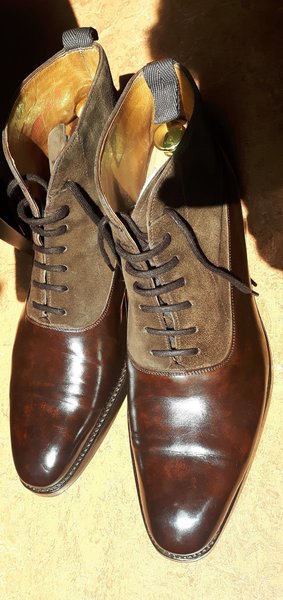
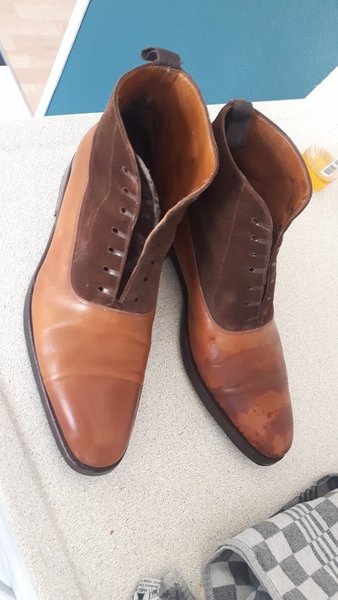
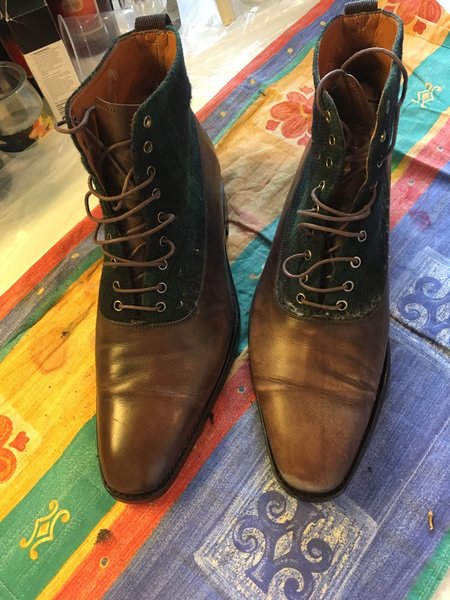
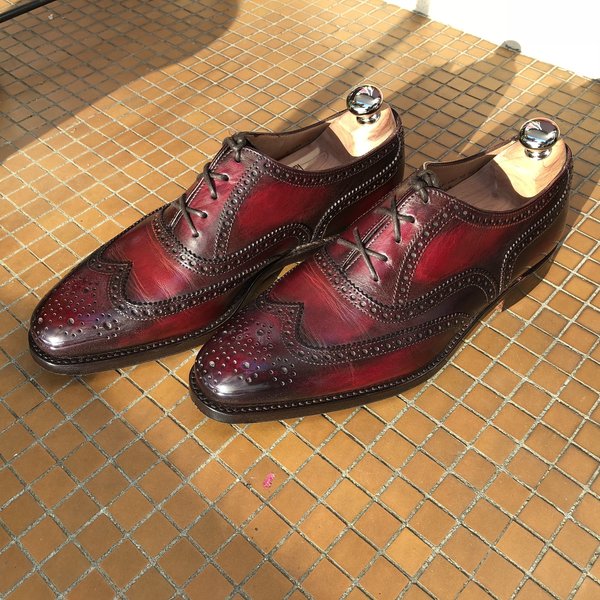
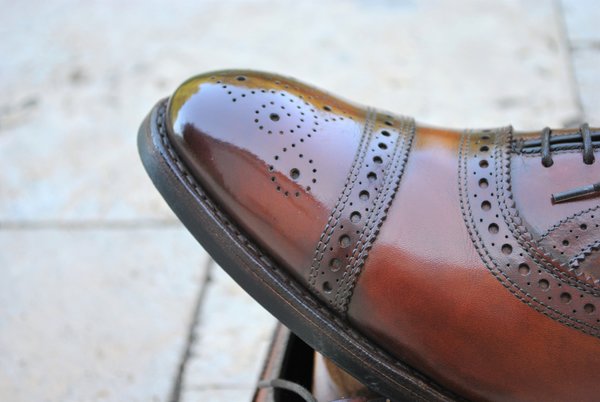
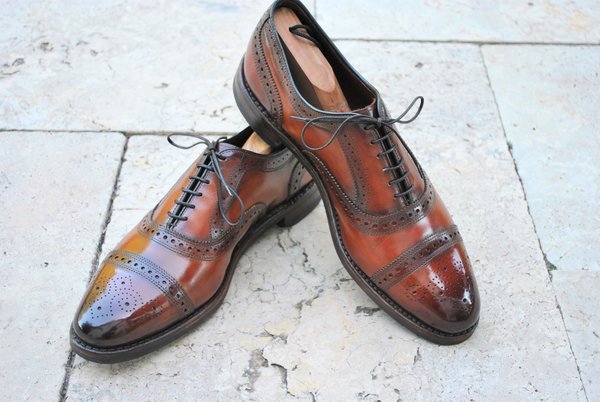
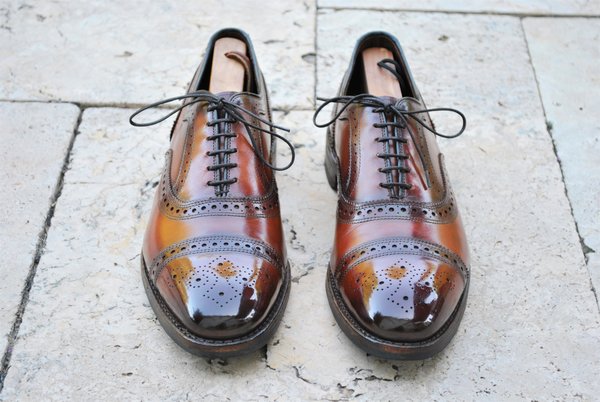
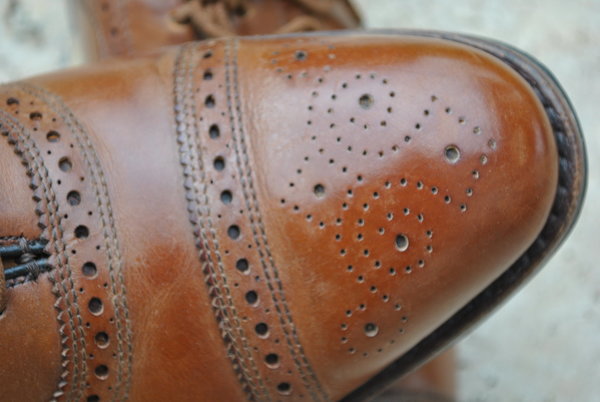
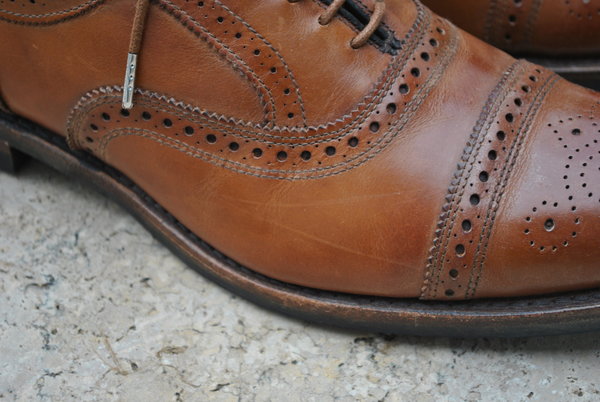
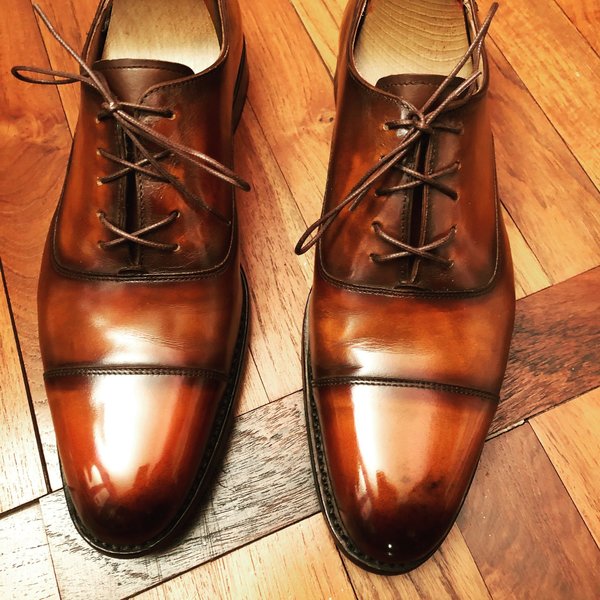
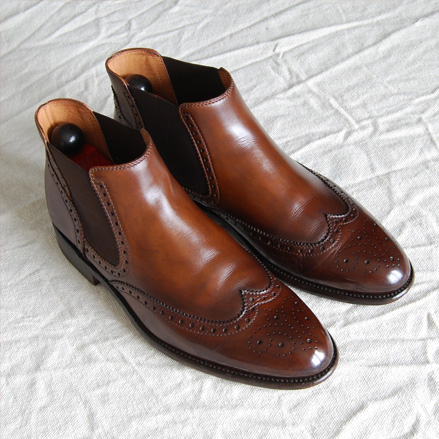
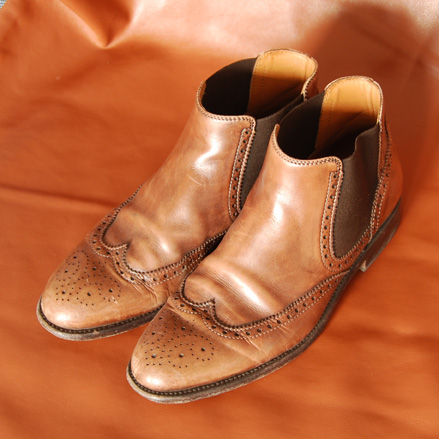
The leather was essentially unfinished so I simply built up layers of darker and lighter colored brown creme polishes. The key seems to be rubbing them into the leather, buffing and letting them set. Then repeating with different colors. I didn't use wax until the very end and used a bit of red, green and brown in the darker areas to give complexity to the color.
 

adagio

Senior Member
Joined
Jun 2, 2008
Messages
428
Reaction score
19
Just got these back from Ron. Here is the before shot:
sl370787vf1.jpg


and the afters:

stratons4.jpg


stratons3z.jpg
 

Douglas

Stupid ass member
Spamminator Moderator
Joined
Aug 17, 2007
Messages
14,243
Reaction score
2,166
Whenever I try to antique using just polishes (cream polishes) they look crappy. The color develops cracks and flakes off at creasing points on the shoe, and in the end it just all seems to revert back to the original color.

Should I be using wax polishes at the end to hold everything in?
 

SkinnyGoomba

Stylish Dinosaur
Joined
Jan 3, 2008
Messages
12,895
Reaction score
2,402
Originally Posted by Douglas
Whenever I try to antique using just polishes (cream polishes) they look crappy. The color develops cracks and flakes off at creasing points on the shoe, and in the end it just all seems to revert back to the original color. Should I be using wax polishes at the end to hold everything in?
+1 I've tried it on shoes i wear often and it looked like complete hell in no time flat. I just removed all the layers of polish and went back to using the color of the shoe. My local shoe guy informed me that the various dyes in the polishes i was using were causing a very blotted look, and also causing very sharp looking creases since the areas immediately around these natural creases was significantly darker. my shoes look much better now without the polish-antique. If you want it done right, you need to do it in the process that ron recommends.
 

imainish

Senior Member
Joined
May 31, 2006
Messages
138
Reaction score
1
Adagio -

Those look great! Enjoy them. Ron's work is amazing.

What color and finish did you request to get them like that?
 

Ich_Dien

Distinguished Member
Joined
Oct 8, 2007
Messages
6,765
Reaction score
1,451
Adagio, might I suggest some darker laces to complete a lovely job on those shoes.
 

adagio

Senior Member
Joined
Jun 2, 2008
Messages
428
Reaction score
19
Originally Posted by anon
those look so much better, adagio.
Thanks

Originally Posted by imainish
Adagio -

Those look great! Enjoy them. Ron's work is amazing.

What color and finish did you request to get them like that?

I just sent him a photo of a pair that he had already posted here.

Originally Posted by jimmyoneill
Adagio, might I suggest some darker laces to complete a lovely job on those shoes.
Absolutely, dark brown laces a must.
 

MiniW

Distinguished Member
Joined
Aug 15, 2008
Messages
1,001
Reaction score
9
Let me start off with saying that Ron saved ******. Not that he did anything to help me personally, but using this thread as a reference really led me to save my shoes. I dyed a pair of brown boots black a few months ago and thought it was cake. Of course it was a flat color and I wasn't into antiquing or anything of that sort. The pair of shoes I just did over the weekend was a completely different story. Let 's start...

So the shoes are a pair of Dior Homme boots in a beige/tan color. I sort of liked the color when I got them but after wearing them out a few times, I thought they were too light and I wanted something darker. Here are two pictures of them when they were new.

DSC_0062.jpg


DSC_0065.jpg


I thought it would be badass to color them grey, since I've seen other Dior boots in a grey color that I really liked. So in the last week or so, I bought Fiebing's grey dye and dye reducer (VERY CRITICAL) and waited for a time when I could have 2 hours to dye my boots grey.

Friday night (4/10/09) - I decided to dye my shoes at this time. I repeated my process last time which was to strip the shoes with deglazer which I bought at a local cobbler. This time, I made a mixture of the grey dye and reducer (which as it turned out was still too thick) and just used the dabber that came with the grey dye to literally "paint" my shoes.

The results (pictures taken the morning after):

Library-655.jpg


Library-656.jpg


If you were thinking like me, you would be thinking that "oh no, I just F--ked up a pair of Dior boots!"
Before I started, my plan would be to coat the shoes heavy with dye, then wipe off the excess and get a good finish with black shoe polish. But after seeing how they looked, like caked in dye, I was sure that I would get nowhere with just polish. Where do I go from here?!?
 

MiniW

Distinguished Member
Joined
Aug 15, 2008
Messages
1,001
Reaction score
9
So I had to step away from the shoes after I was finished with them Friday night. I did a search on the internet and through a link on AAAC, I was brought back to this thread on SF with the inside info by Ron Rider on antiquing. Though I did not want to, I knew I had to pretty much start over if I wanted to save these shoes. The funny thing is that Ron specifically said "The last thing you want to do is coat the shoe in 1 or 2 levels of dye and then try to polish it out...you end up with highly contrasted streaks, taky build-up of dye and a non-durable finish." - Basically exactly what I did in the beginning. By the time I went to bed Friday, I had a plan and was eager to work on the shoes again the next day.

So Sat night (4/11/09) I sat down and started my new plan. The first 4 steps were:

1) Strip off the dye with deglazer.
2) Condition with Lexol.
3) Strip off the dye with deglazer.
4) Condition with Lexol.

At this point the shoes looked pretty unfinished. There was basically a grey haze over the original tan color. But the color was much milder and I regained hope that I can re-finish them properly.

5) Moving on, I made mix of Fiebing's grey dye, black dye, and a lot of dye reducer. Using a paint brush, I tested the mixture on the back of the shoes and saw that I was getting thin coats, like the pictures Ron posted. And with some brush strokes, I was able to blend in the dye to get different gradients of color on the shoe. I must be getting somewhere.

After an hour and a half of stripping down last night's work, and almost finishing one shoe. I took a two pictures here:

Library-659.jpg


Library-660.jpg


As you can see, the toe is not completed on either shoe, but the one with the new dye is starting to look more finished. This is definitely taking longer than expected.

For the next 2-3 hours, this is what I did:

6) I finished painting both shoes with the diluted dye mixture (making the toes and heels darker).
7) I conditioned the shoes with Lexol (and noticed that some of the dye rubbed off)
8) I polished the shoes with a Ecru colored shoe creme that to me looked like somewhere between the original color and grey (a transition of sorts). Again I noticed that some of the dye rubbed off)
9) I polished the toes, heels and near the welt with black wax polish.

Since some of the dye rubbed off, I had to apply more. I know that Ron does 6 or more coats per shoe, but these were pretty dark already and I've been breathing in fumes all day from the chemicals so I didn't want to work on them that much longer. With that being said, I proceeded to

10) Apply diluted dye to the areas I wanted darker, by this time I gave up on the grey dye and just used black with lots of reducer.
11) Polish with black wax polish.

At this point I figured that I was pretty much done. I had been working on these for 4 hours and I think they look good, but it is dark in my apartment in the city so I can't really tell. I must also mention that everytime I applied the diluted dye mixture, it helped blend in any obvious streaks from my first blotched dye job. So by the time I was finished with the second dye application. They didn't look like they were caked in dye at all.

Sunday morning (4/12/09): Nice bright light coming in the windows. The shoes look better than I expected.

Here are a few pictures:

with flash:
Library-661.jpg


no flash:
Library-662.jpg


sides:
Library-666.jpg


detail:
Library-668.jpg
 

MiniW

Distinguished Member
Joined
Aug 15, 2008
Messages
1,001
Reaction score
9
And very lastly, here are some pictures after I removed the painter's tape from the midsoles.

Library-671.jpg


Library-672.jpg


Library-673.jpg


Overall I am happy with them. I do notice that they have a blue tint (likely from the Fiebing's grey dye) so that the final color is dark blue-grey. Right now they look like art but I'm eager to wear them out and see how they handle scuffs and scrapes. Hope you enjoyed the pictures.

Comments are welcome!
 

DuMont

Member
Joined
Apr 11, 2009
Messages
6
Reaction score
0
Very cool! I like the antiqued black look, especially the toes. I think they came out great, and am glad you were able to correct the errors and get them where you wanted them. I can't wait to try this myself.
 

Featured Sponsor

How important is full vs half canvas to you for heavier sport jackets?

  • Definitely full canvas only

    Votes: 92 37.6%
  • Half canvas is fine

    Votes: 90 36.7%
  • Really don't care

    Votes: 26 10.6%
  • Depends on fabric

    Votes: 41 16.7%
  • Depends on price

    Votes: 38 15.5%

Forum statistics

Threads
506,944
Messages
10,593,071
Members
224,351
Latest member
dgdfgdfg
Top