Francisco D'Anconia
Senior Member
- Joined
- Apr 20, 2007
- Messages
- 186
- Reaction score
- 0
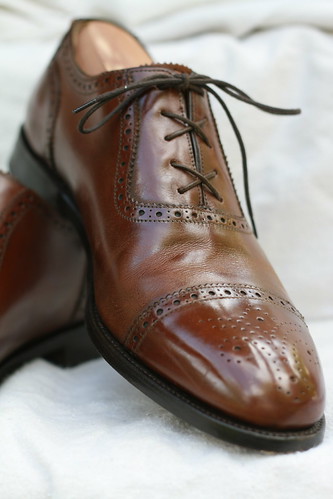
Inspired by Rider's most famous thread on shoe antiquing, I started out a new project a couple of months ago. I started with these £99.00 adelaide semi-brougues from CT. I've done a few of these antiquing projects before and they've turned out pretty well, but I'm still not going to try this with shoes that I'm going to miss if I totally screw the job up. Here are the original shoes as they arrived from CT...
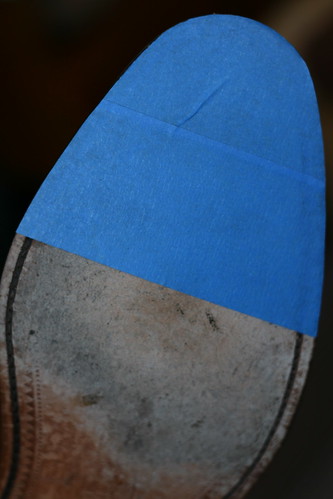
 I started by taping the soles off using blue painters tape. I like 2" wide tape; it covers more with each strip and reduces work and gaps where dye can seep through... First I applied the strips of tape. Here I show all the strips applied. This is to show what it looks like when all applied but before trimming the excess off....
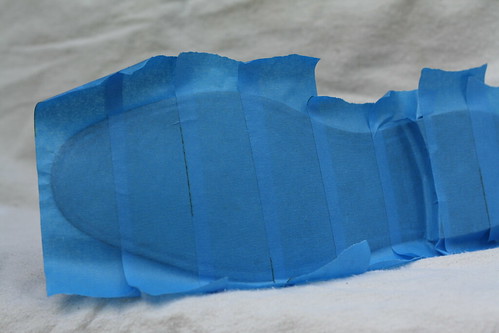 But it's easier to apply tape strip by strip and trim the excess off strip by strip...
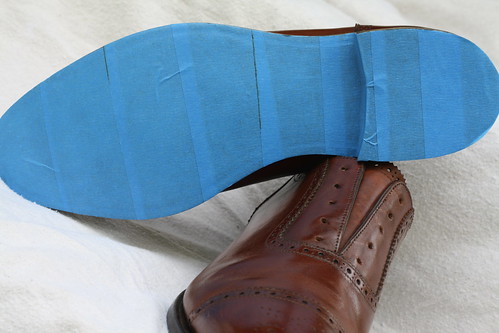
 All taped-up and ready for stripping....
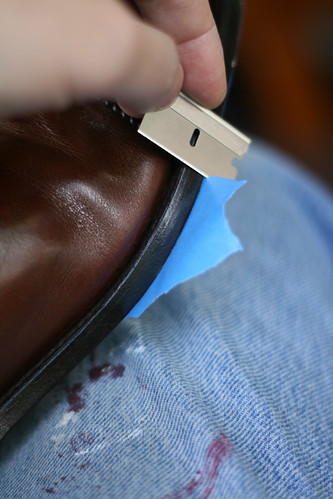
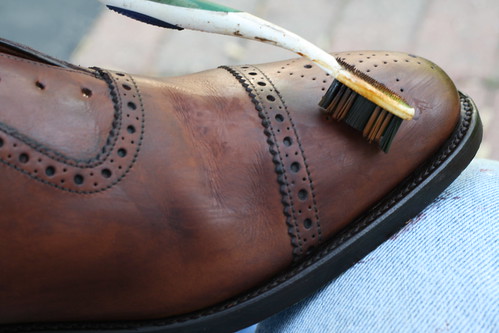
 Stripping with Anglus Deglazer. I like applying with a toothbrush to get into the nooks and crannies...
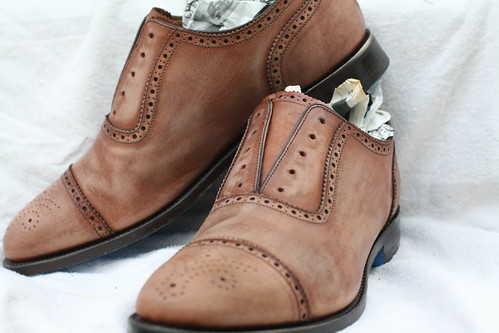
 The shoes stripped down...
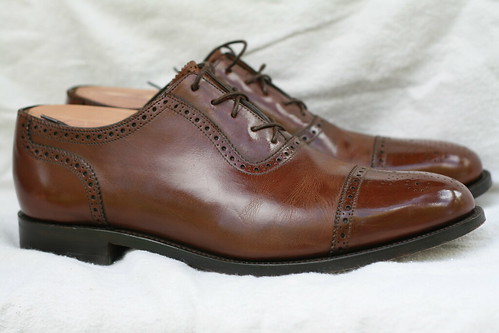
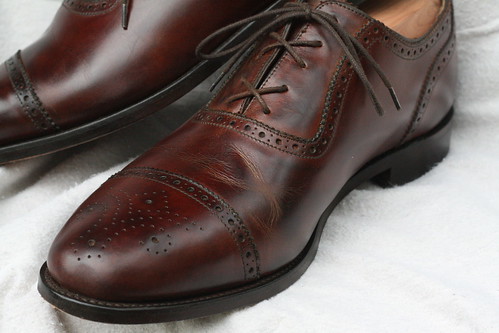
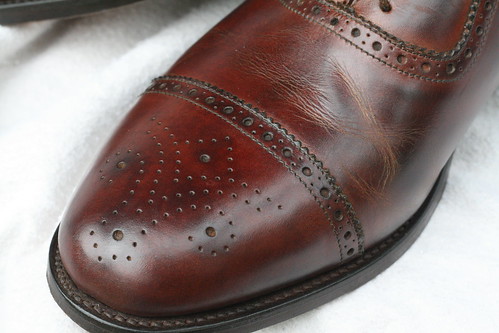
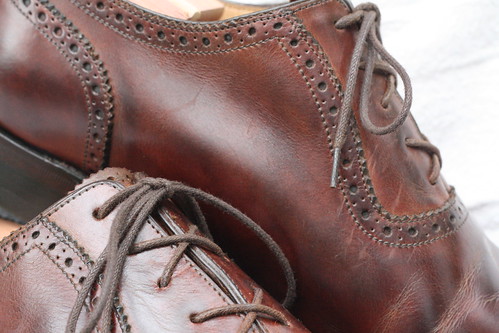
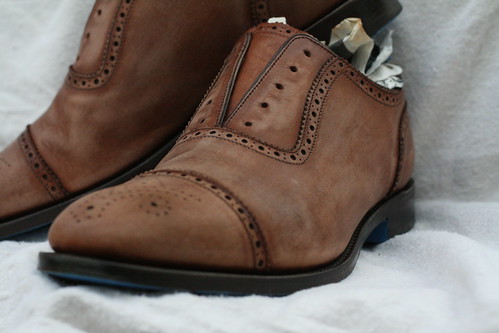 After applying coats of Fiebing's light brown dye. Following Rider's suggestions, I applied as follows:
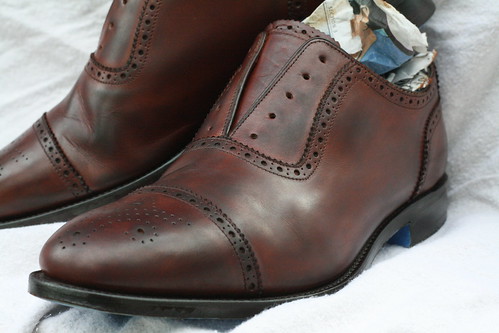
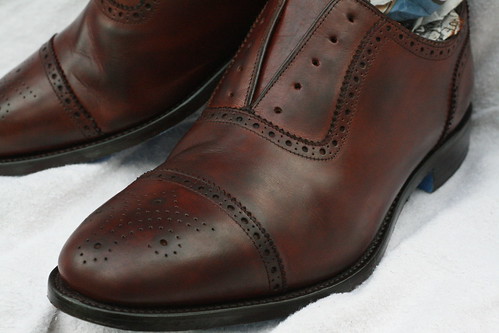
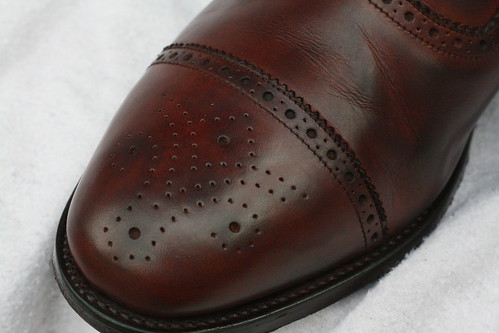 After dyeing, I applied:
- Wrap finger in an old t-shirt.
- Dip wrapped finder in the dye.
- Blot the wrapped finder on newspaper to remove excess dye.
- Smear the dye on a small area of the shoe's surface, about 1 to 1.5 square inches.
- Rapidly wipe the application areas with a clean old t-shirt. This removes excess and smears the dye to create a mottled/antiqued effect.
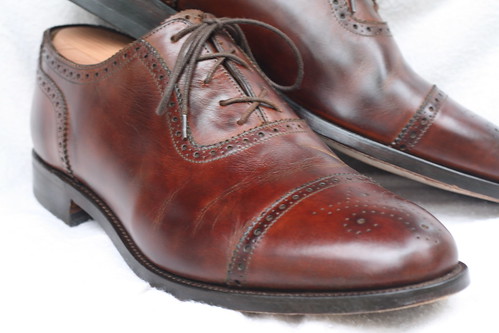
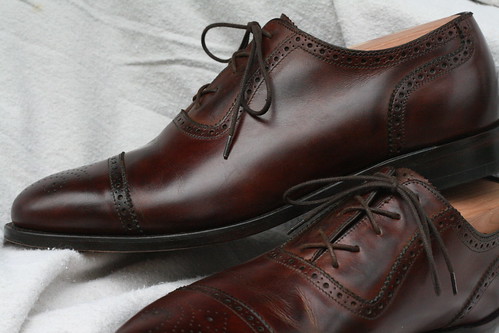
- Neutral shoe cream, then brushed-off.
- Green shoe cream, then brushed-off.
- Tan past wax polish, then brushed-off and buffed.....