- Joined
- Mar 8, 2002
- Messages
- 57,519
- Reaction score
- 36,349
A little while ago, I posted about the making of a pair of Viberg boots, here
Today, I present to you, a picture book of the lasting and soling of the boots. This should give you a good idea of the effort and time to go from a piece of leather to the boots that you wear on your feet. (All pictures courtesy of Guy Ferguson).
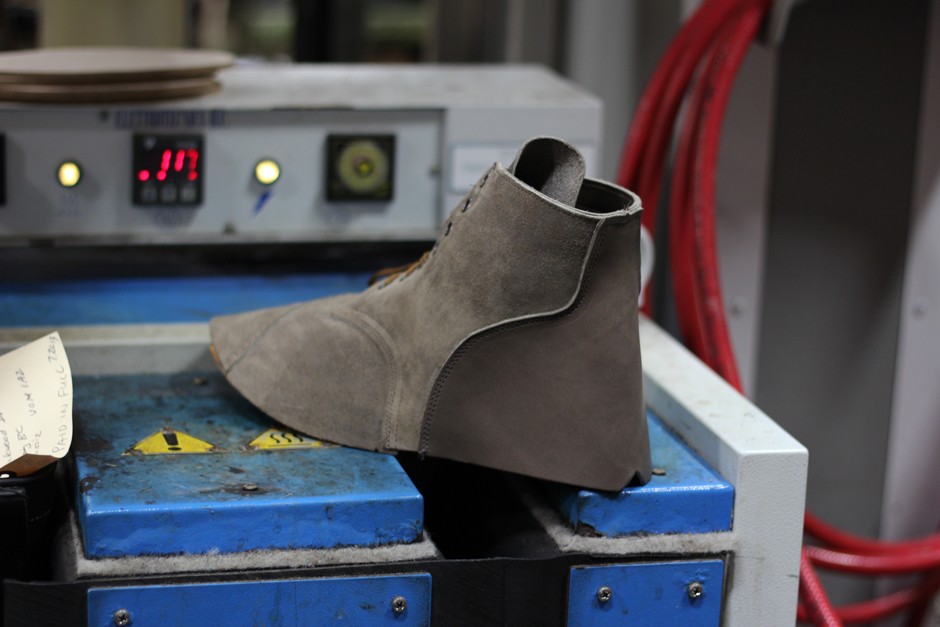
Upper fresh out of the steamer (around 120 degrees).

Putting in the leather heel counter.
Pinching and stretching the upper to prepare it for the pullover machine.
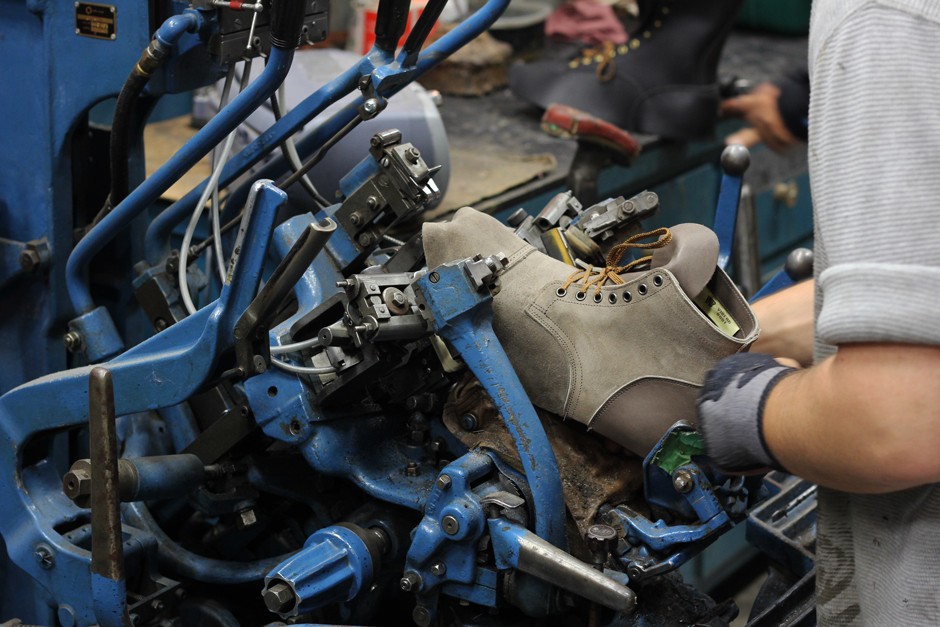
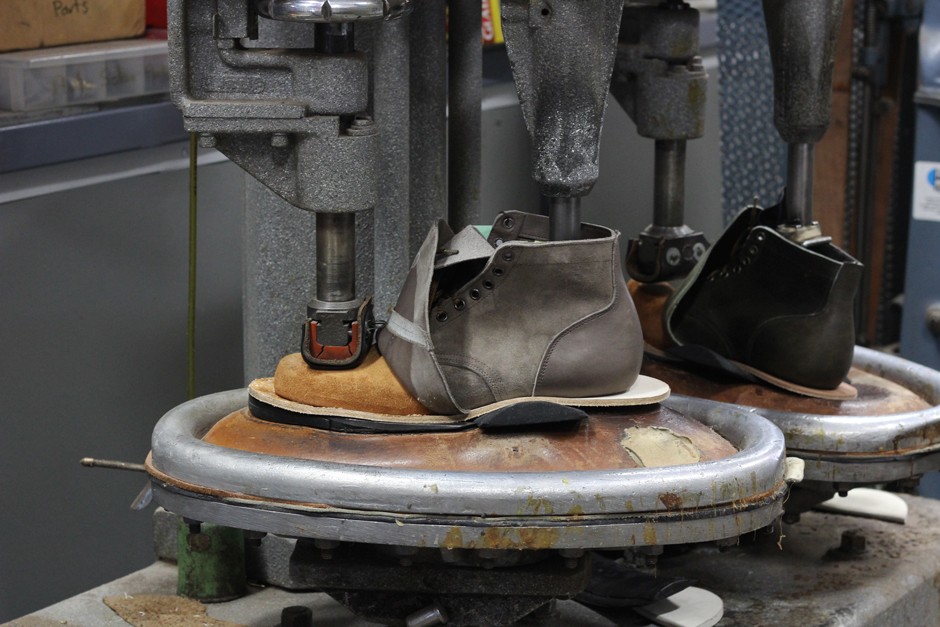
The pullover machine forms the upper around the last and tacks in nails on either side to hold it in place.
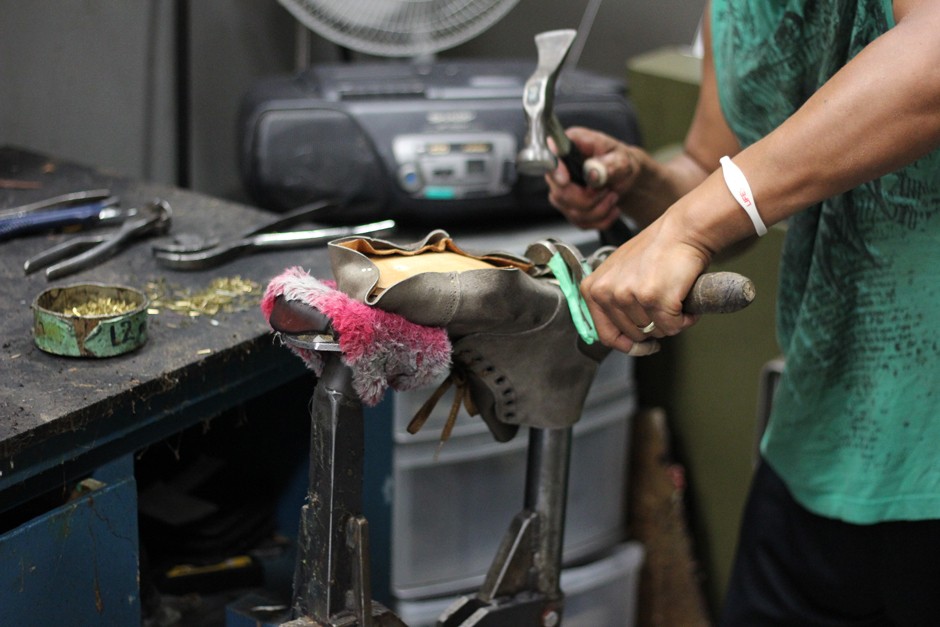
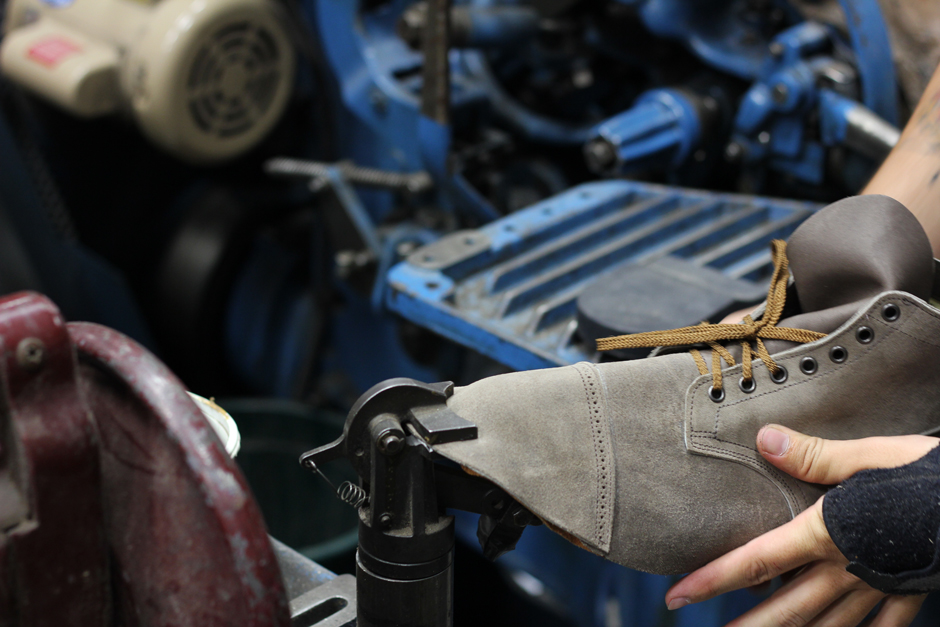
Hand lasting and nailing the upper.
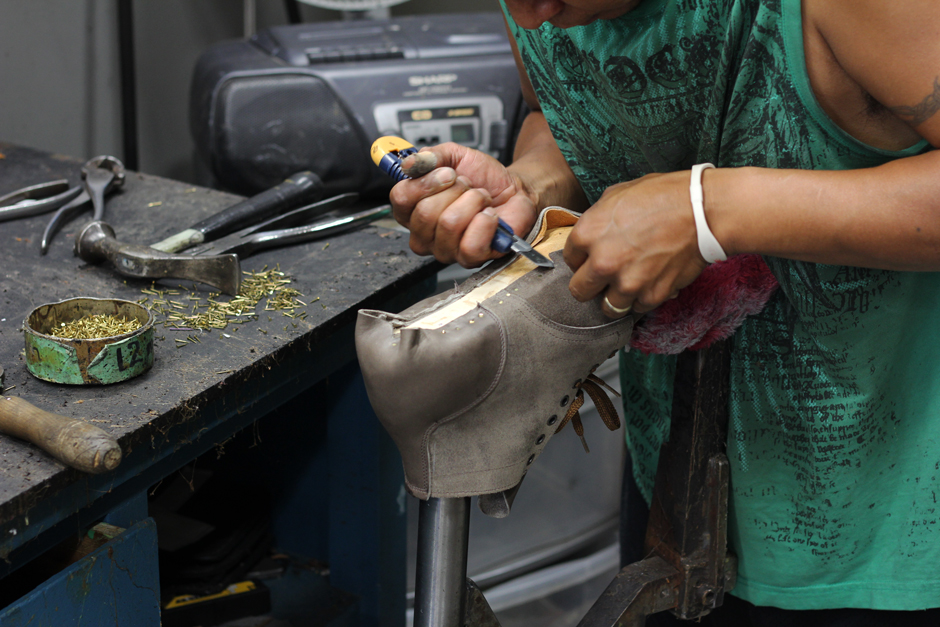
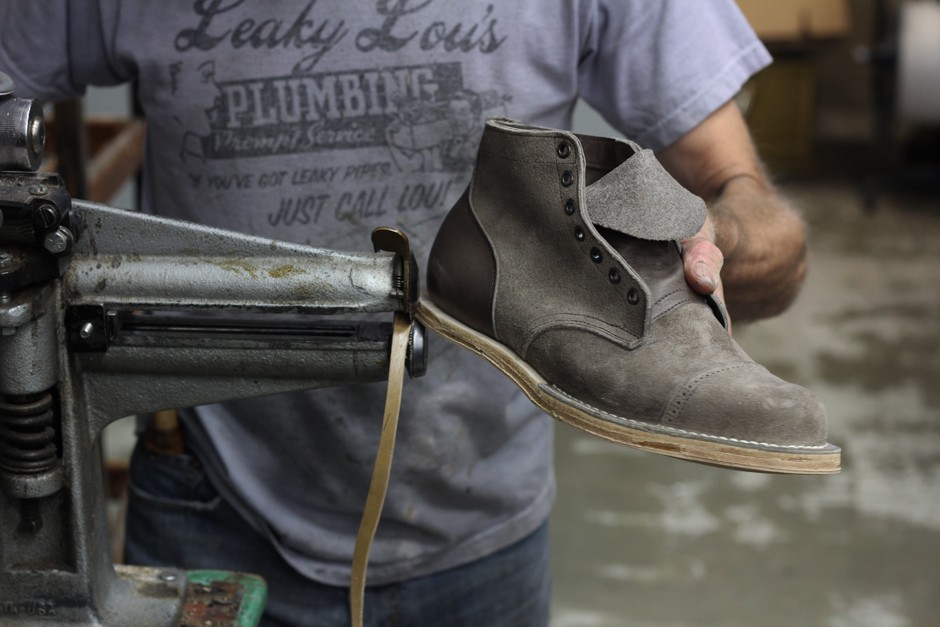
Trimming and splitting the upper.
Wiping in and nailing the heel.
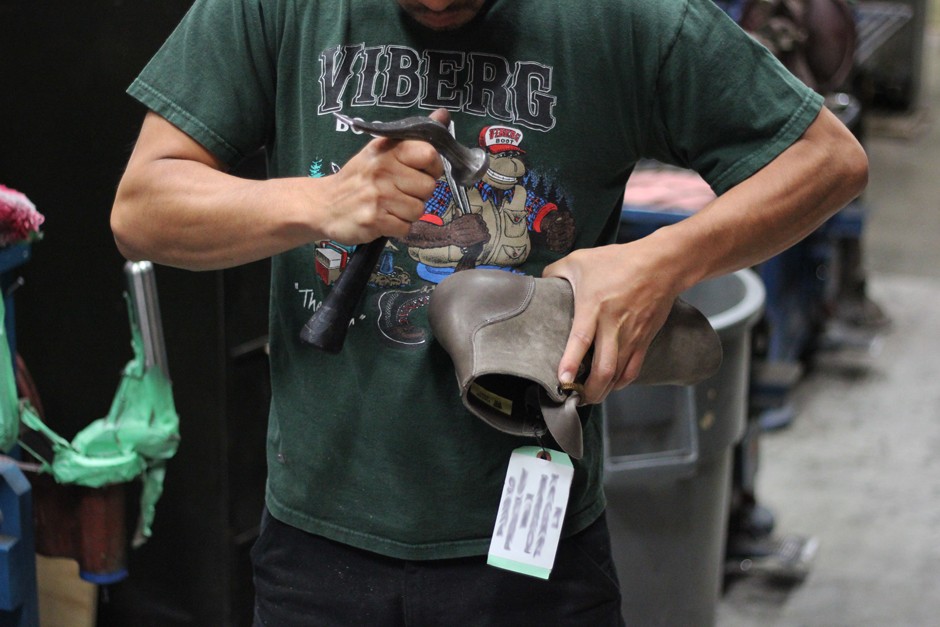
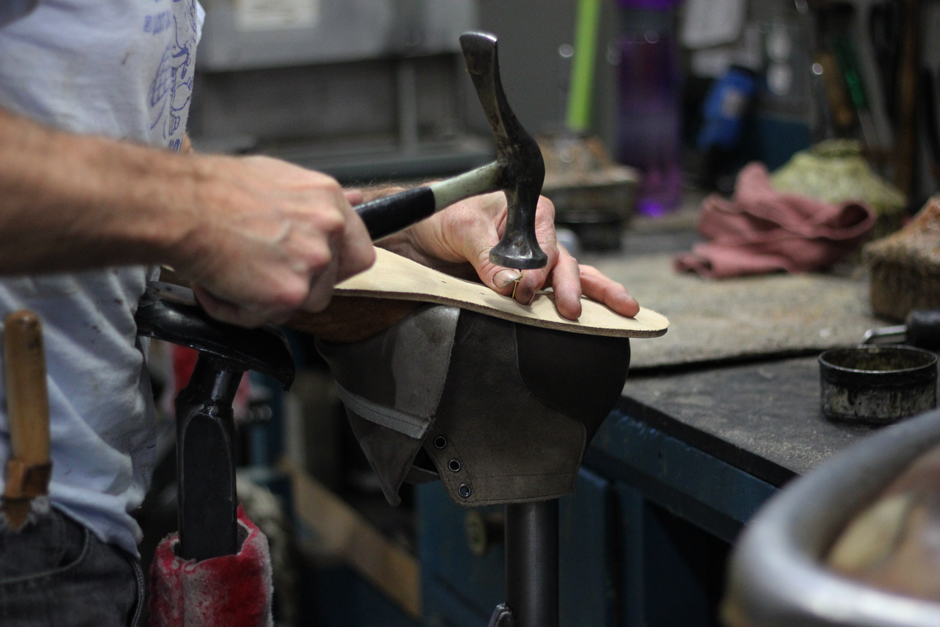
Hammering the counter to smooth out any inconsistencies.
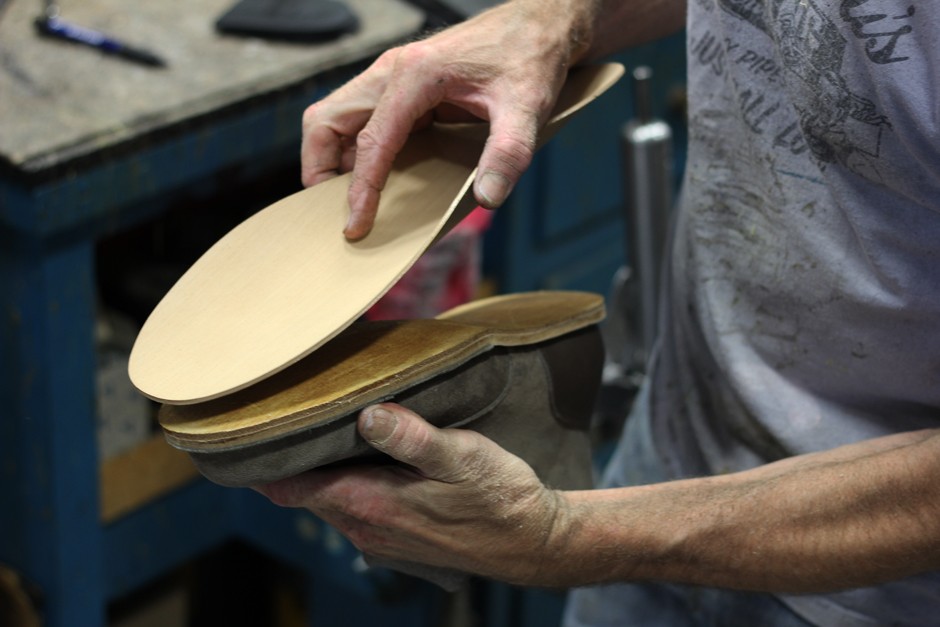
A coated, stainless steel shank and specialized foam insert are applied.
The air pressured sole press sticks the first midsole.
It is then nailed to the insole by hand. The steel base of the lasts keeps the nails from penetrating the interior of the boot.
The vamp is glued to the liner and midsole.
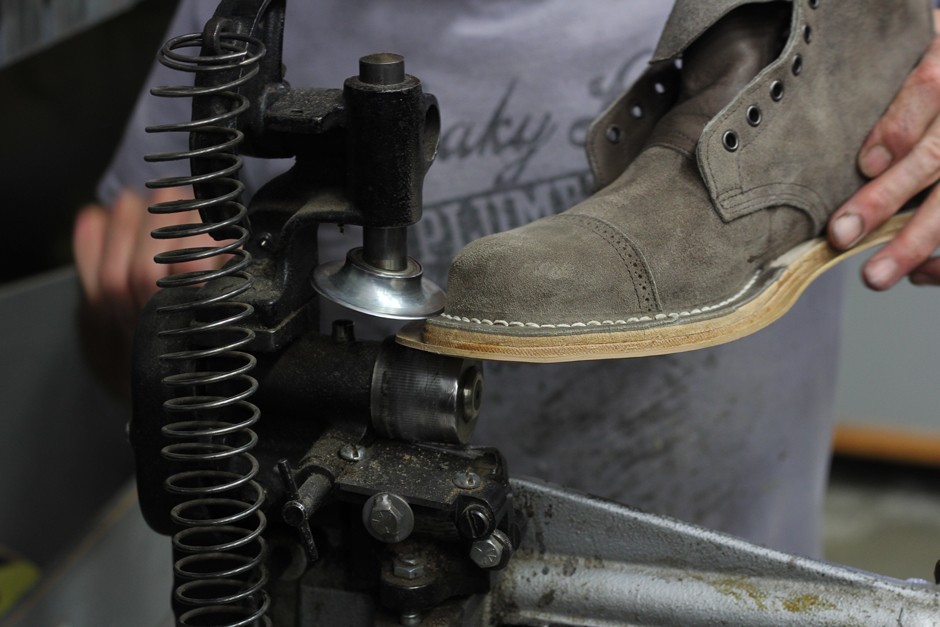
Wiper plates form the shape of the toe around the last while heat activates the glue.

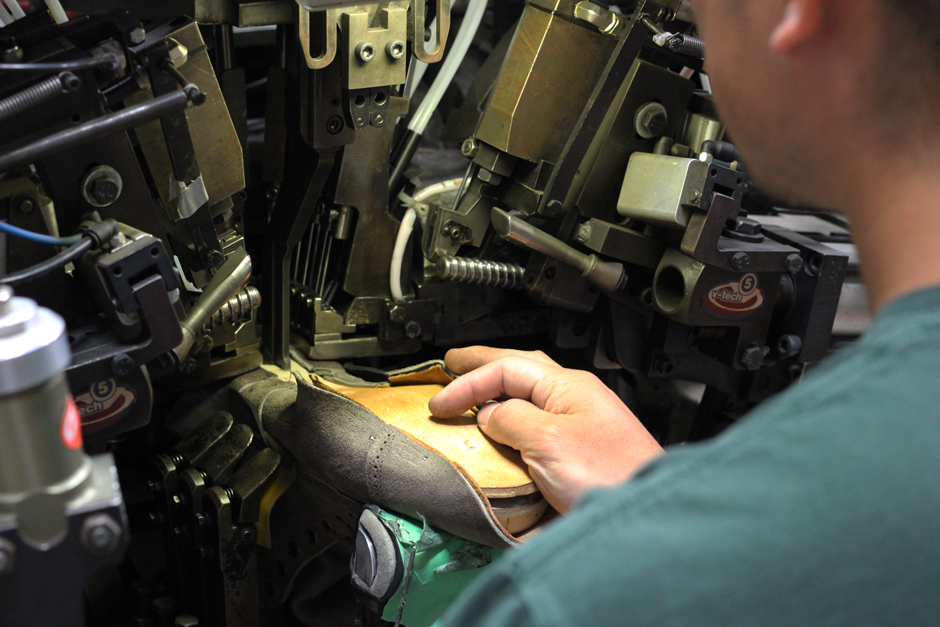
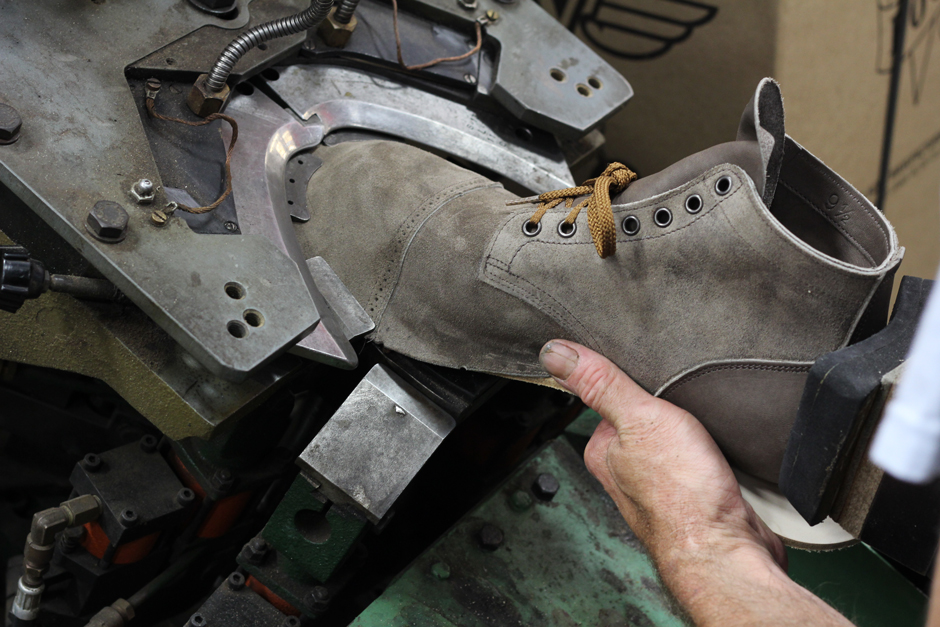
The rest of the vamp must be formed manually. This machine also trims some of the excess upper with a blade from below.
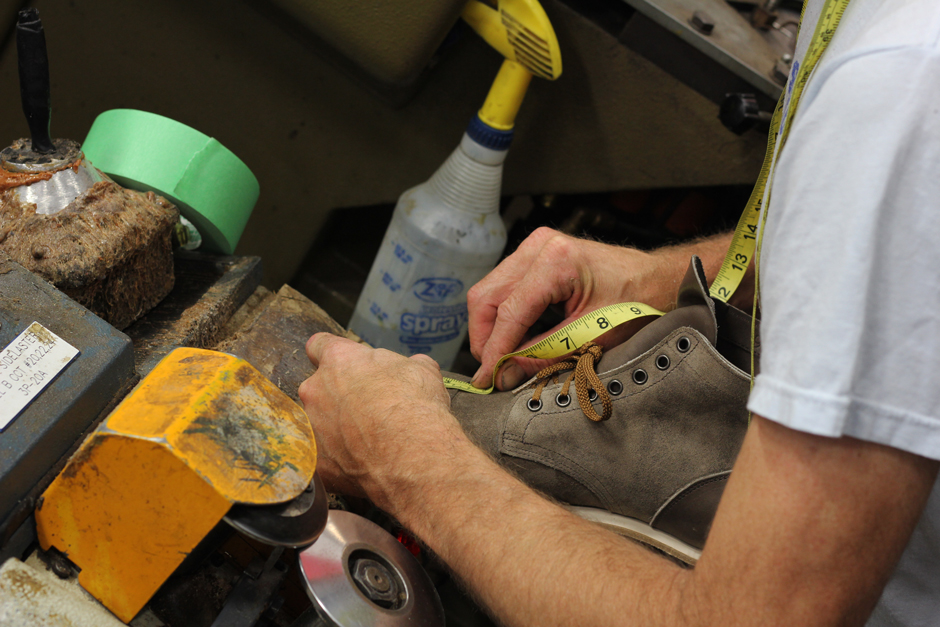
Because the toe is wiped in by a machine we measure all the toe caps to ensure the distance is consistent on each pair.

Hand trimming the upper and first midsole.
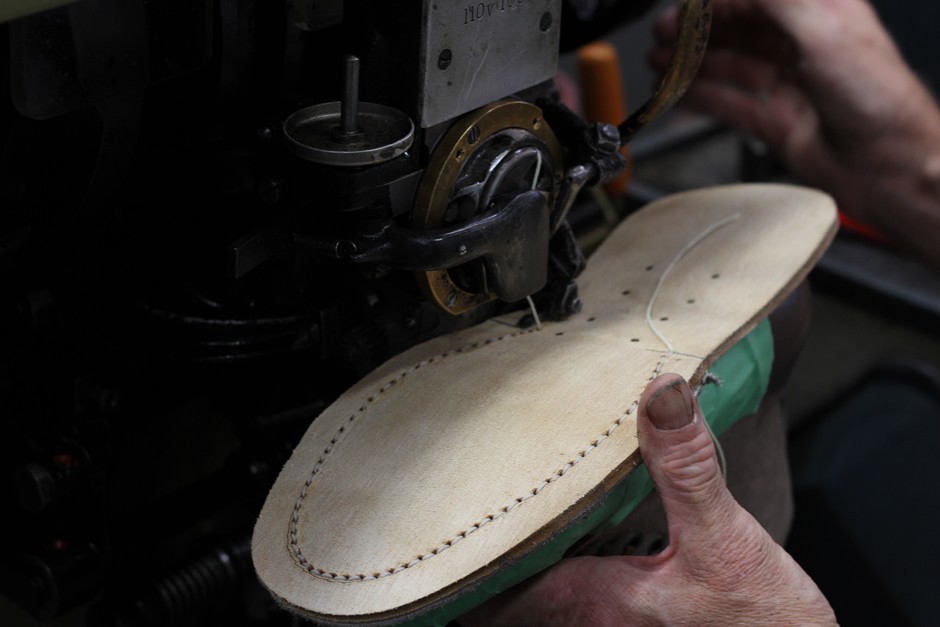
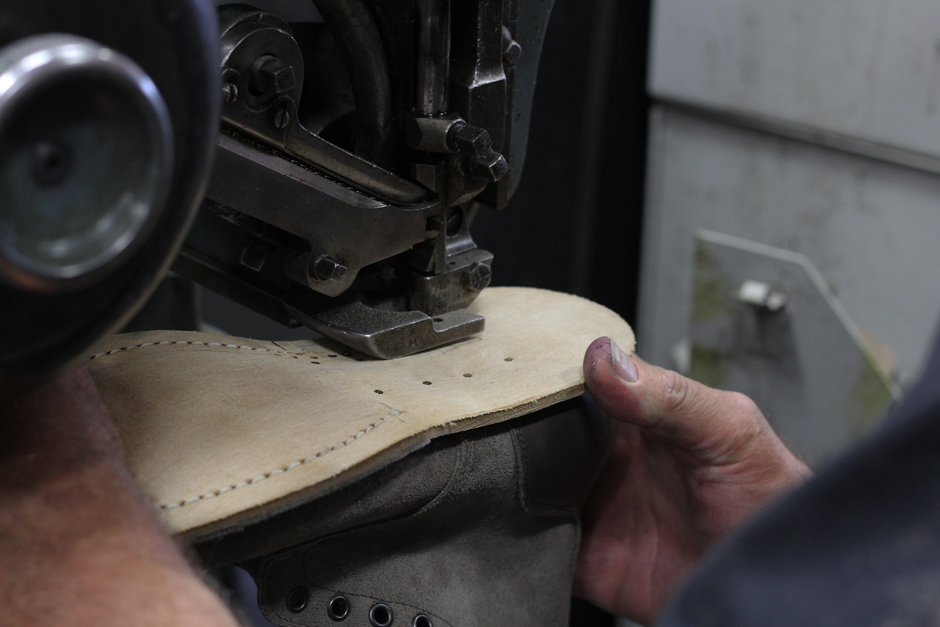
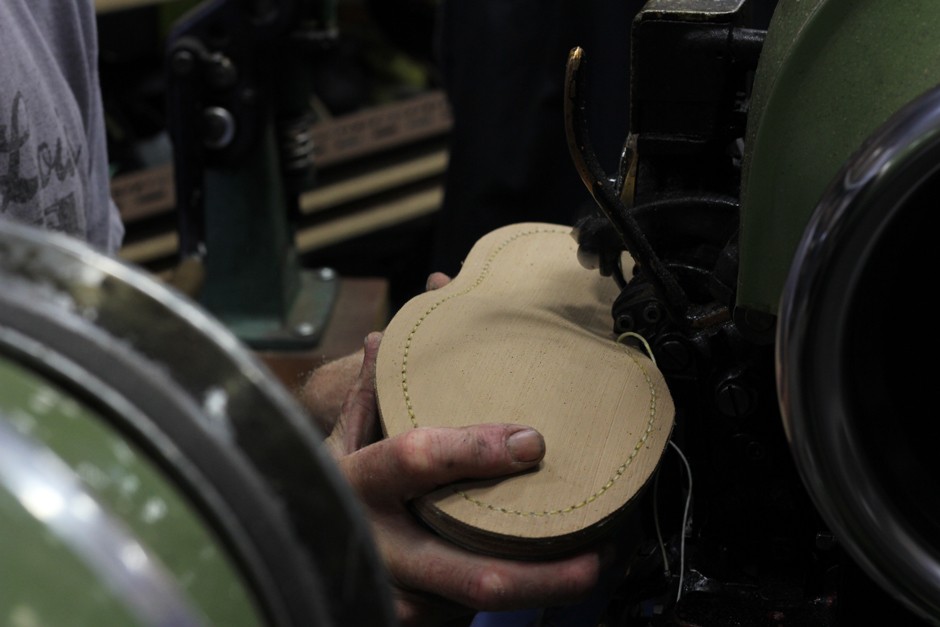
The first midsole is stitched is stitched to the vamp upper.
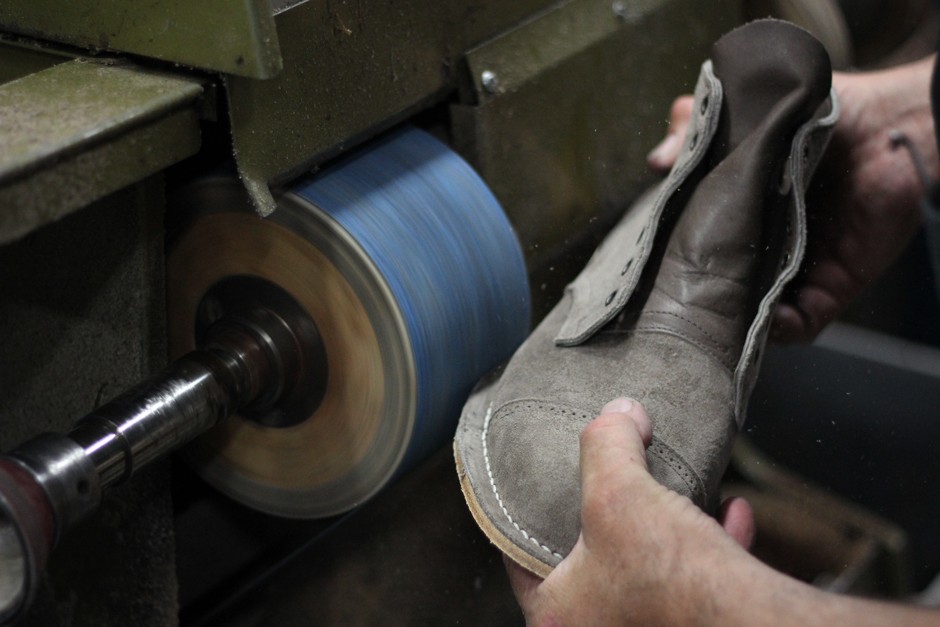
Rough sanding and inspection by Glen Viberg.
Nailing the midsole to the heel.
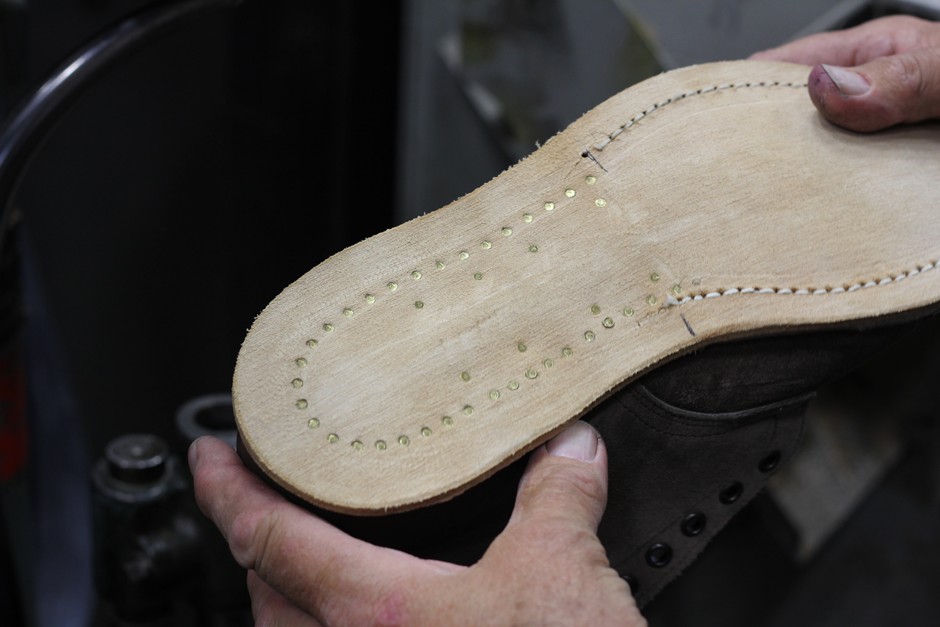
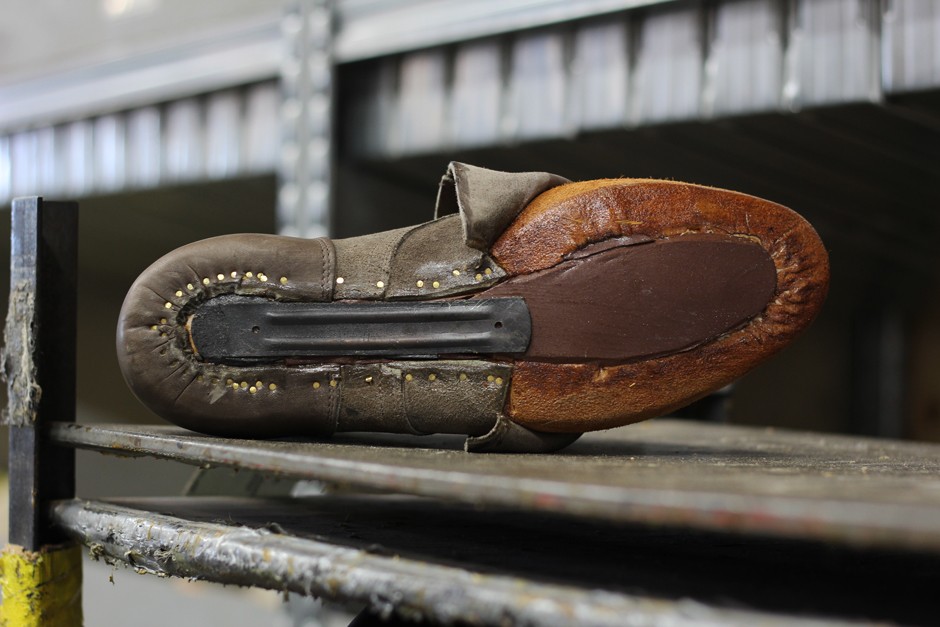
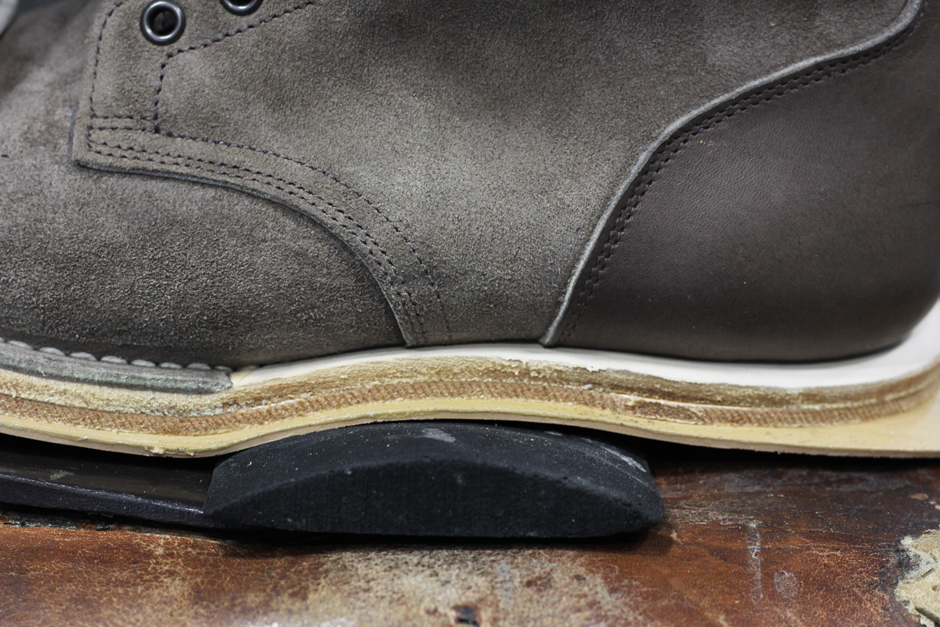
This is what a finished midsole looks like before a second midsole, runner, or outsole is attached.
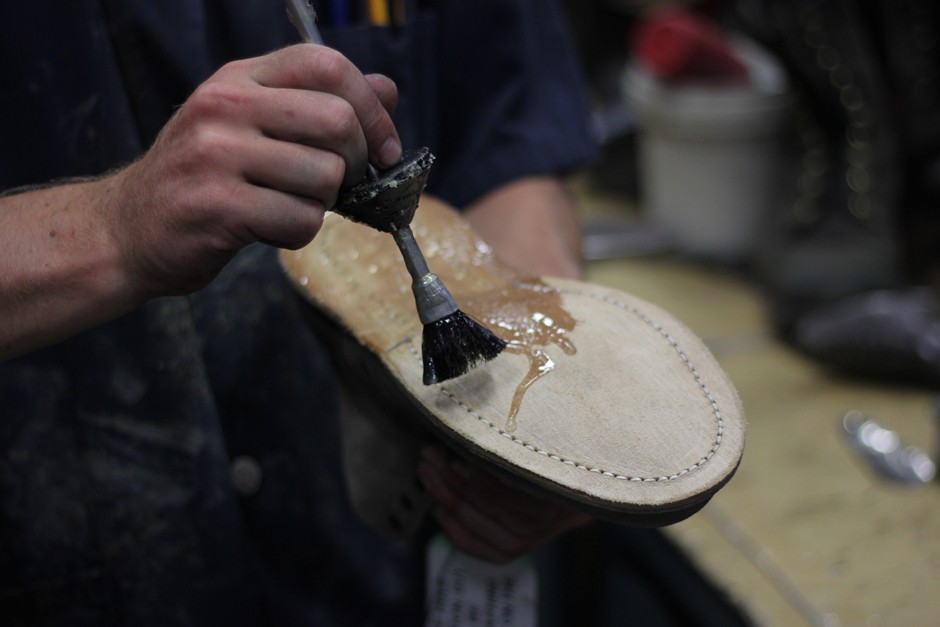
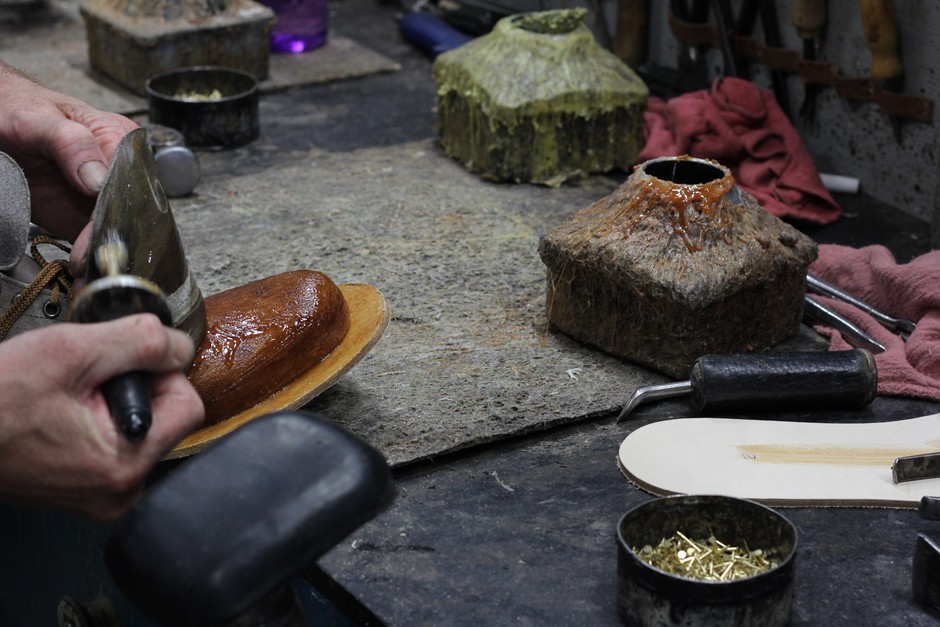
Glue is applied to the first midsole.
After the second midsole is glued and trimmed a rubber runner, or slip sole is applied (only for boots with a wedge sole unit).
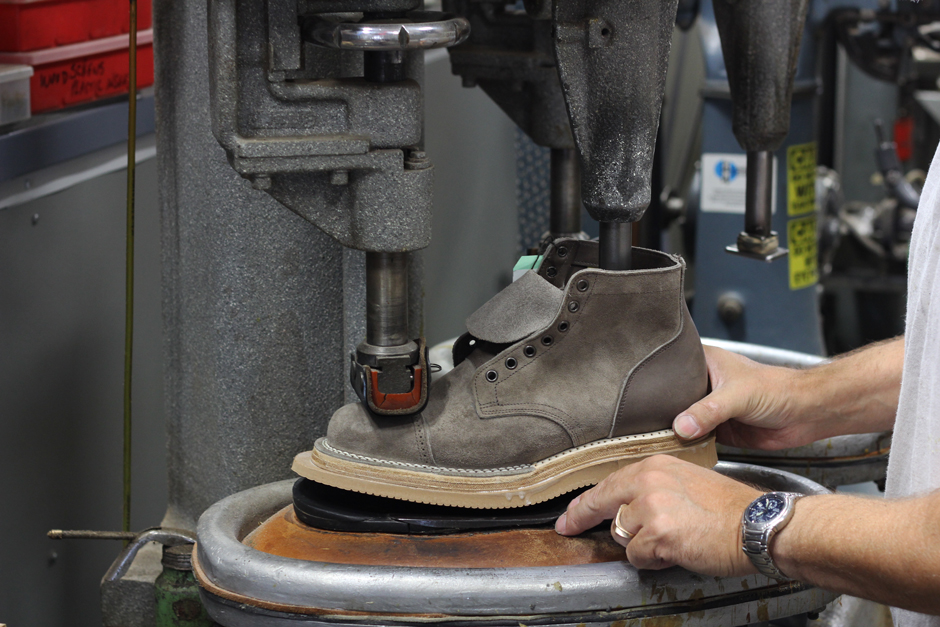
The upper, two midsoles and the runner being compressed in the sole press.
A 5-in-1, cranked by hand, further seals the edges after the sole press.
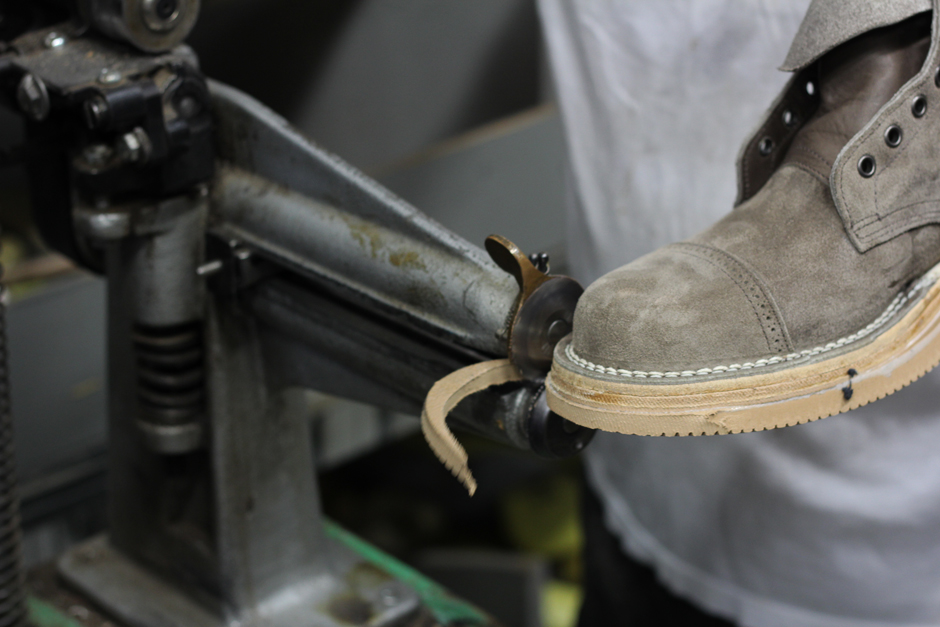
The runner is trimmed by hand on the same machine.
The runner and second midsole are stitched 360 degrees to the first midsole and vamp upper.
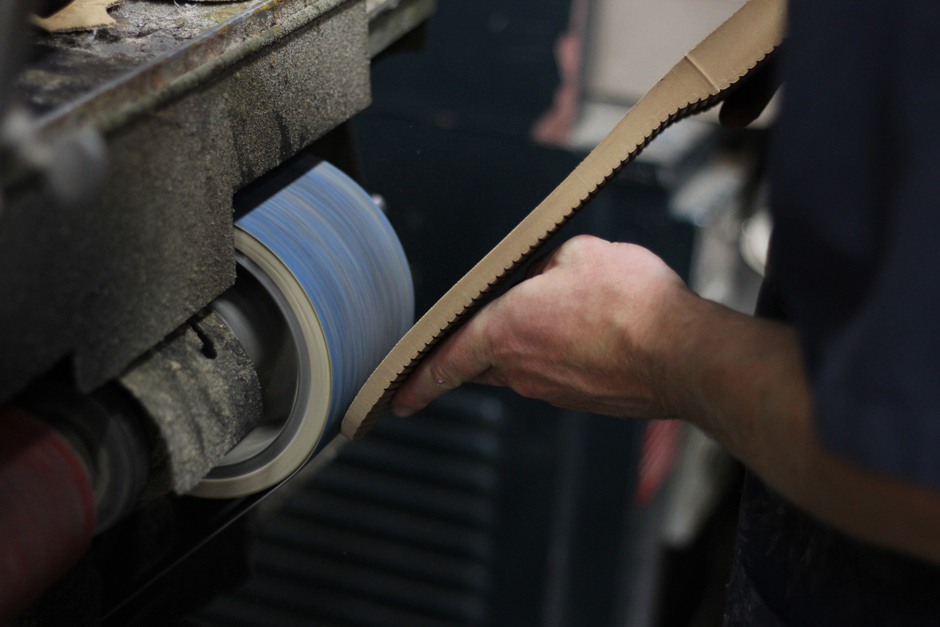
Sanding the Vibram 2060 outsole.
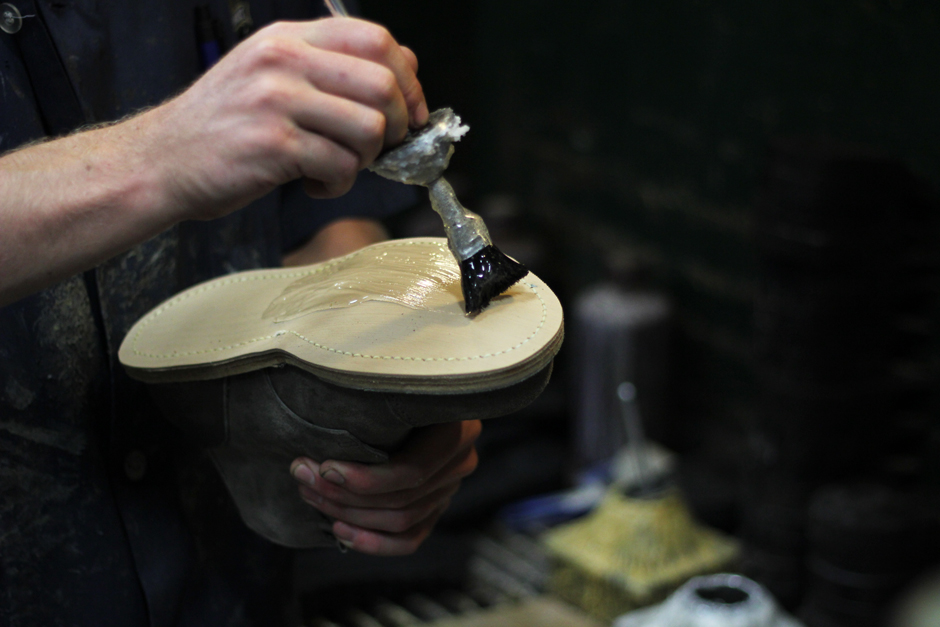
Applying glue to the runner.
The sole heater activates the glue and prepares the outsole to be stuck.
Placing the outsole.
The last trip to the sole press.
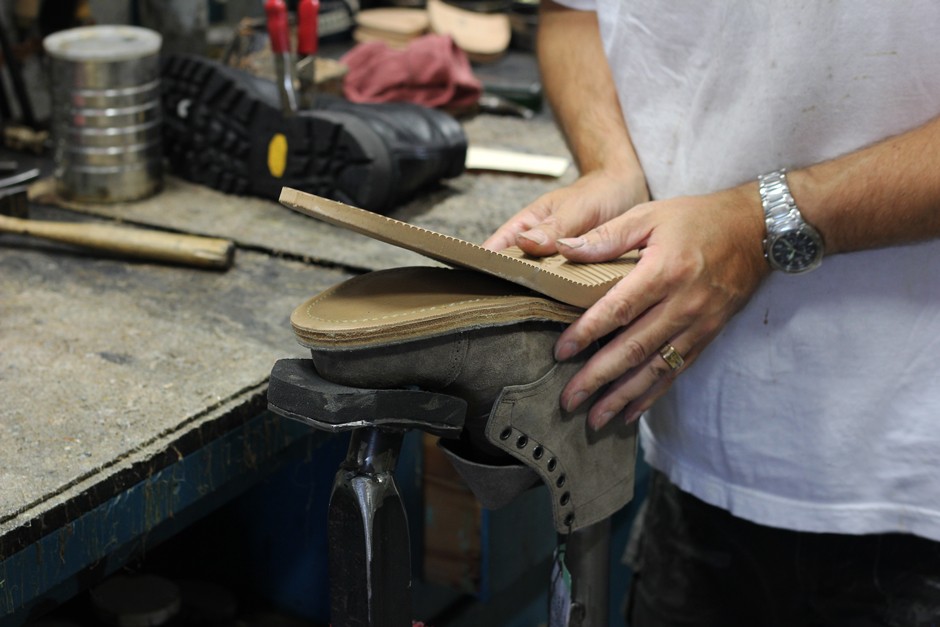
Trimming the outsole.
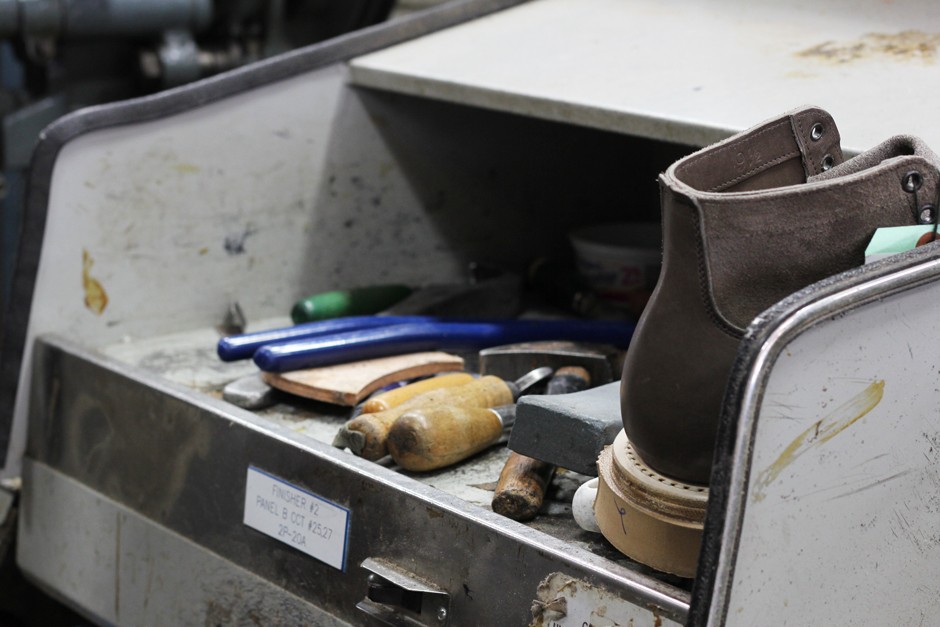
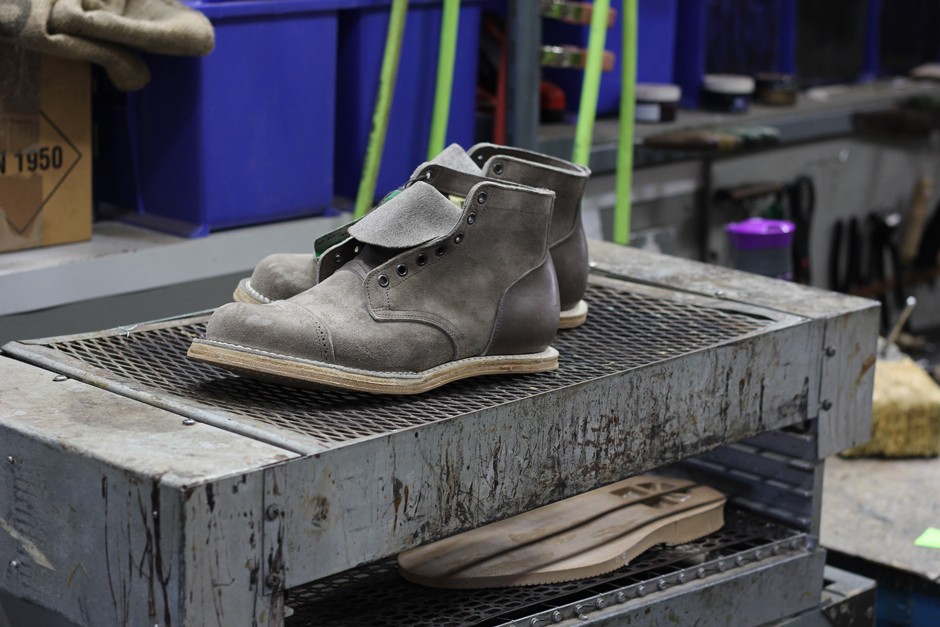
Awaiting sanding and finishing.
Today, I present to you, a picture book of the lasting and soling of the boots. This should give you a good idea of the effort and time to go from a piece of leather to the boots that you wear on your feet. (All pictures courtesy of Guy Ferguson).
Upper fresh out of the steamer (around 120 degrees).
Putting in the leather heel counter.
Pinching and stretching the upper to prepare it for the pullover machine.
The pullover machine forms the upper around the last and tacks in nails on either side to hold it in place.
Hand lasting and nailing the upper.
Trimming and splitting the upper.
Wiping in and nailing the heel.
Hammering the counter to smooth out any inconsistencies.
A coated, stainless steel shank and specialized foam insert are applied.
The air pressured sole press sticks the first midsole.
It is then nailed to the insole by hand. The steel base of the lasts keeps the nails from penetrating the interior of the boot.
The vamp is glued to the liner and midsole.
Wiper plates form the shape of the toe around the last while heat activates the glue.
The rest of the vamp must be formed manually. This machine also trims some of the excess upper with a blade from below.
Because the toe is wiped in by a machine we measure all the toe caps to ensure the distance is consistent on each pair.
Hand trimming the upper and first midsole.
The first midsole is stitched is stitched to the vamp upper.
Rough sanding and inspection by Glen Viberg.
Nailing the midsole to the heel.
This is what a finished midsole looks like before a second midsole, runner, or outsole is attached.
Glue is applied to the first midsole.
After the second midsole is glued and trimmed a rubber runner, or slip sole is applied (only for boots with a wedge sole unit).
The upper, two midsoles and the runner being compressed in the sole press.
A 5-in-1, cranked by hand, further seals the edges after the sole press.
The runner is trimmed by hand on the same machine.
The runner and second midsole are stitched 360 degrees to the first midsole and vamp upper.
Sanding the Vibram 2060 outsole.
Applying glue to the runner.
The sole heater activates the glue and prepares the outsole to be stuck.
Placing the outsole.
The last trip to the sole press.
Trimming the outsole.
Awaiting sanding and finishing.
Last edited: