inlandisland
Senior Member
- Joined
- Jan 14, 2010
- Messages
- 557
- Reaction score
- 439
Hello. Today I am going to share the process I use for taking in a dress shirt along the side seams and sleeves. Hopefully by the time I'm finished this will be a useful guide for others who want to try doing this relatively simple alteration on their own (and not look like one of Iroh's guides)!
I am intending this as a guide for those with little sewing experience. For this reason I will be finishing the shirt with french seams as opposed to the flat felled seams you usually find on dress shirts simply because I believe a frech seam is a little easier to do well. Once you have done a few shirts you may decide that it's worth your time to do flat-felled seams, but on your first try it would likely just frustrate and discourage you. While the following might still look like it's beyond your ability, look at it this way: You are ripping a total of 4 seams, sewing 8 seams with a standard straight stitch, and doing a little ironing, so it's not all that bad.
Hopefully if you decide to try it yourself you'll discover that you enjoy sewing and wearing clothes that fit well. You may also save a lot of time, money, and frustration trying to find that perfectly fitting shirt, or taking your entire closet to the tailor.
First, you need a shirt and your supplies. This time I am using a shirt from T.M. Lewin:
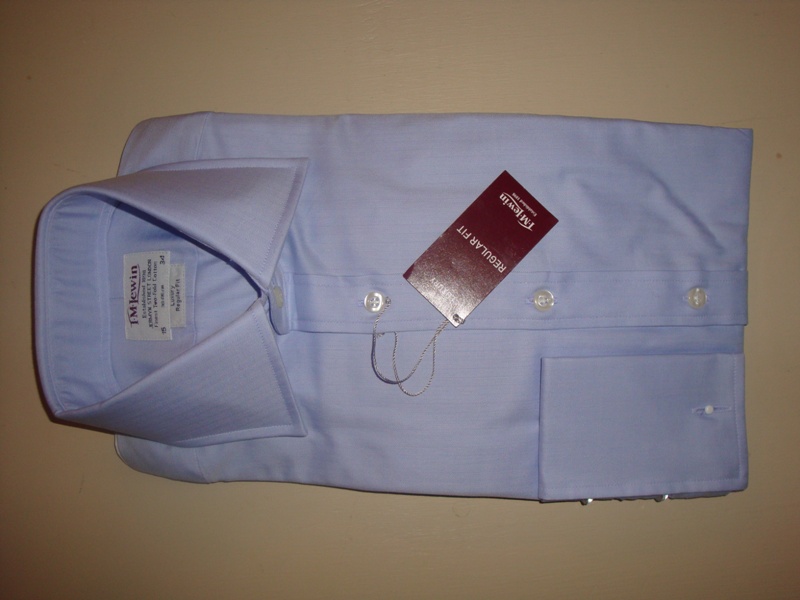
Choose a shirt that already has the options you would want in a custom shirt. This T.M. Lewin shirt has a spread collar, no pocket, a split yoke, long tails, french cuffs and a placket, so I am happy with it, except for the fit.
To do this alteration you will need:

A sewing machine that does a straight stitch, a tailors tape measure, thread, a seam ripper, regular scissors and pinking shears, and some pins. You'll also need an iron and ironing board, of course.
First, unpackage and iron your shirt;

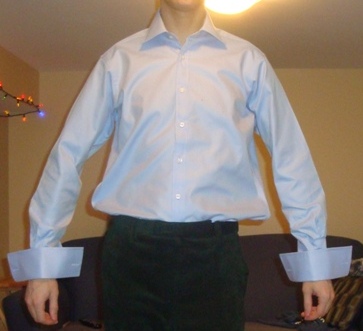
As you can see, with this regular fit shirt, I have a lot of excess room:

Before you do any sewing, it is important to rip the appropriate seams. If you are taking in a shirt along the side seams and the sleeves, you need to rip the hems at the side seams, and the cuffs like so:
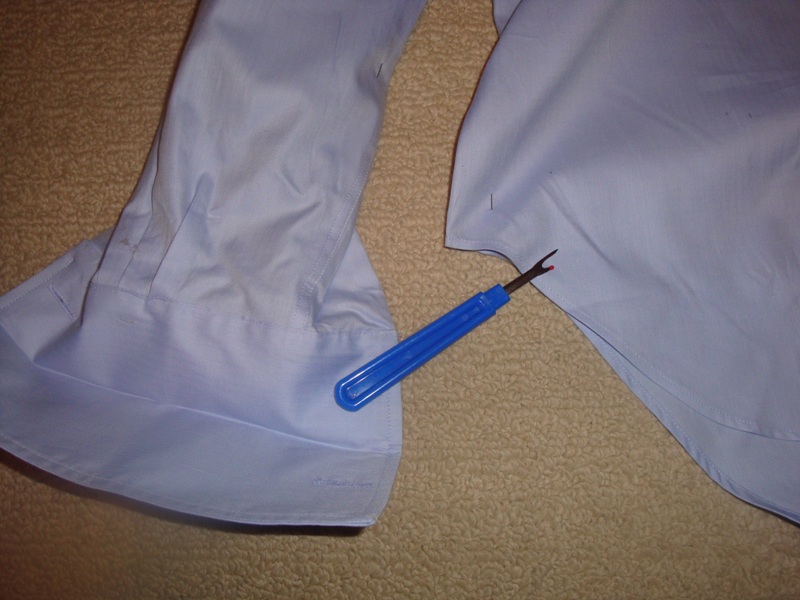
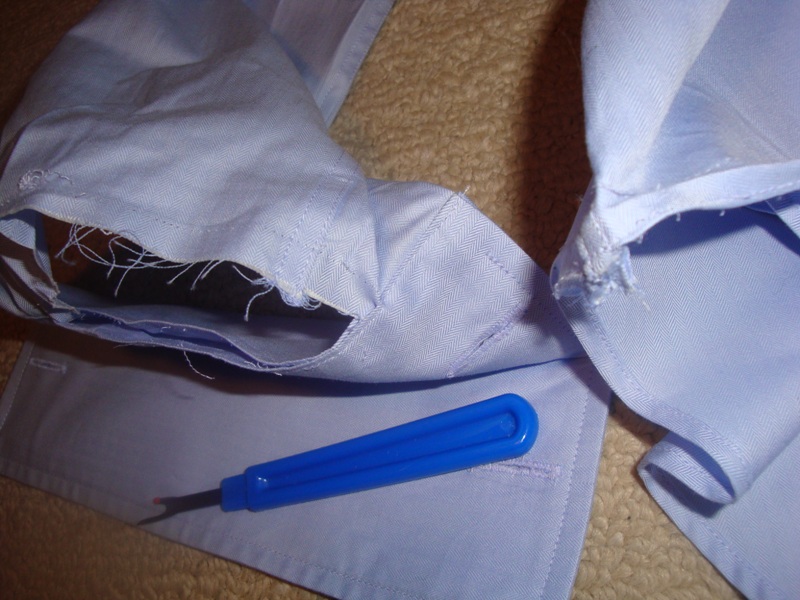
Do this on both sides of the shirt, naturally.
If you already have a dress shirt that fits well, I reccomend simply laying your shirt flat and placing some pins at the measurements you want.to achieve all the way up the side seam and down the arm. Simply subtract equal amounts from each side of the shirt to obtain the 1/2 measurement you need. For example, I like 40" around the chest, so with the shirt buttoned and laying flat I pin it at 20" accross.
For myself, I do 20" at the hips:
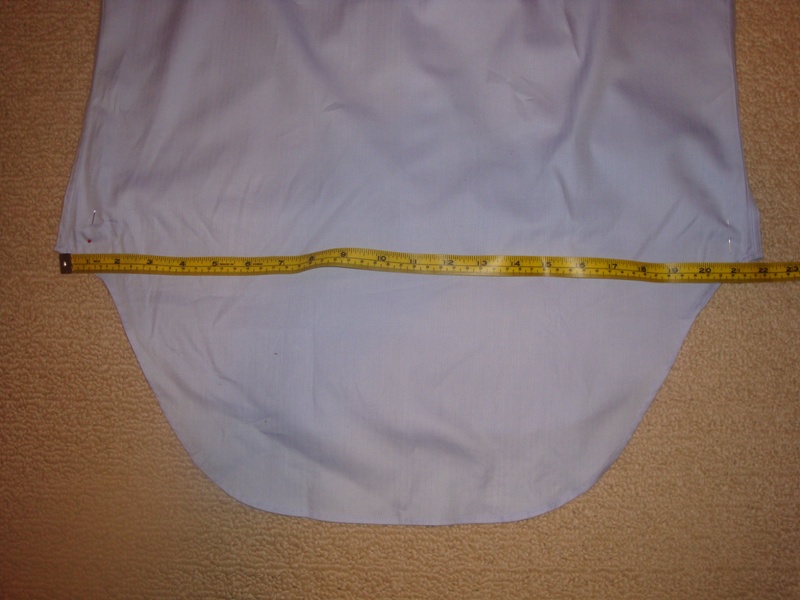
18" at the waist:

20" at the chest/armpit to armpit (on this shirt I needed to subtract 1.5" from each side):

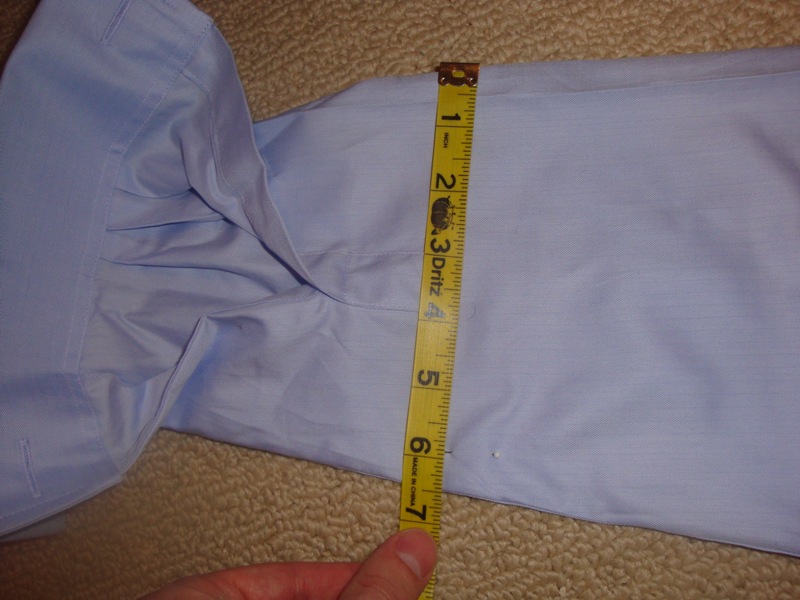
7 " at the bicep and 6" at the forearm:

If you don't have a best fitting shirt, have someone pin the shirt while you are wearing it. Leave some fullness as the new seams are going to consume some fabric on each side and it can quicly become too tight:

Once you are happy with the shirt as you've pinned it up you're ready to start sewing. As long as you are folling your pins as a guide it shouldn't matter if you start from the hem or the cuff - you just sew a straight stich all the way from one to the other with your shirt right side out:
Now your shirt looks like this:

Here is what the seam currently looks like:

To make french seams you now need to do the scary part which is cutting off the excess frabric. This is your POINT OF NO RETURN. Cut with your pinking shears (the zig zag scissors) to avoid ravelling of the cloth. Leave a small (1/8") amounts of fabric beyond the seam you've sewn:


Next, to avoid seams that look sloppy I suggest you press open the allowance of fabric with your iron:

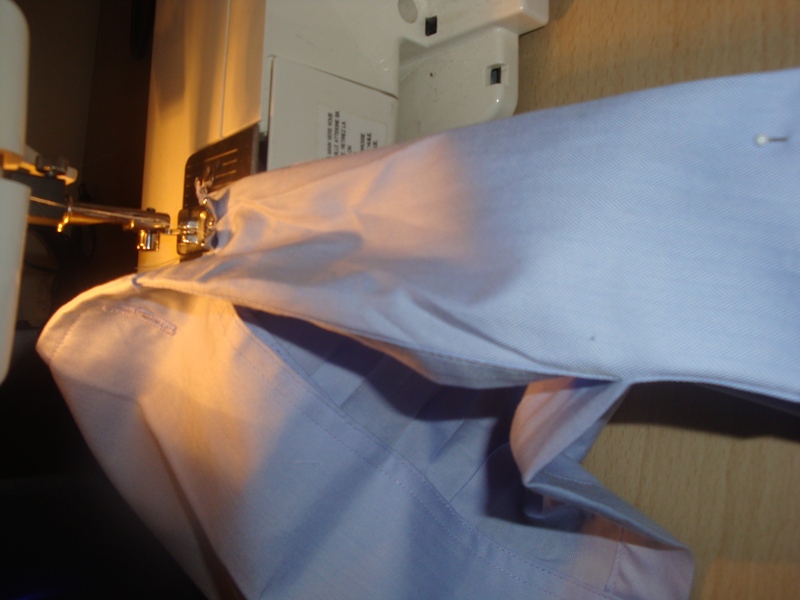
Now turn the shirt inside out. You will sew from hem to cuff again with the shirt inside out which will enclose the raw edges of your shirt inside the french seam to further protect the fabric from ravelling:

Keep the first seam on a tight fold and make sure you sew just far enough in to enclose the raw edge:

Now the side seams/sleeves are nicely and cleanly finished. The last step is to resew your hem and cuffs. Go back to your ironing board and roll and press the bem back into it's original shape, then sew:

Iron in a hard crease on the hem.

Sew it.
Now lay the end the sleeve back between the cuff. Make sure it is properaly alligned so that you catch all 3 layers as you sew along the very edge to match the original seam:


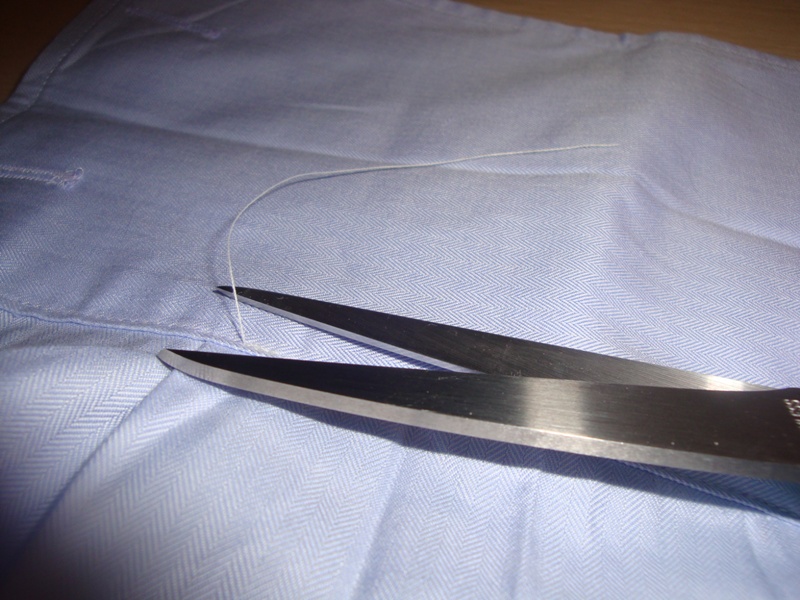
Make sure you snip off all those loose threads:
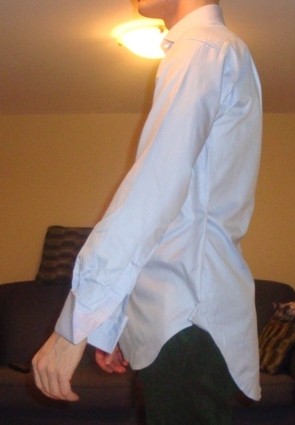
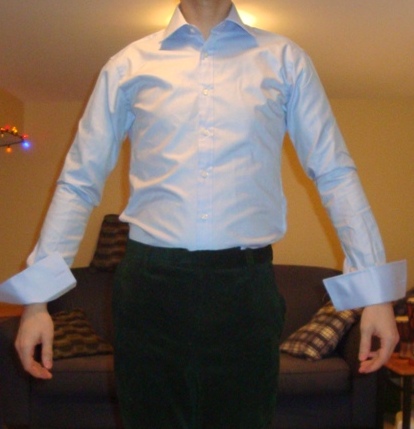
Try on the shirt to make sure no further adjustments are needed:


Now do the rest of your baggy shirts - practice makesperfect better.


I am intending this as a guide for those with little sewing experience. For this reason I will be finishing the shirt with french seams as opposed to the flat felled seams you usually find on dress shirts simply because I believe a frech seam is a little easier to do well. Once you have done a few shirts you may decide that it's worth your time to do flat-felled seams, but on your first try it would likely just frustrate and discourage you. While the following might still look like it's beyond your ability, look at it this way: You are ripping a total of 4 seams, sewing 8 seams with a standard straight stitch, and doing a little ironing, so it's not all that bad.
Hopefully if you decide to try it yourself you'll discover that you enjoy sewing and wearing clothes that fit well. You may also save a lot of time, money, and frustration trying to find that perfectly fitting shirt, or taking your entire closet to the tailor.
First, you need a shirt and your supplies. This time I am using a shirt from T.M. Lewin:
Choose a shirt that already has the options you would want in a custom shirt. This T.M. Lewin shirt has a spread collar, no pocket, a split yoke, long tails, french cuffs and a placket, so I am happy with it, except for the fit.
To do this alteration you will need:
A sewing machine that does a straight stitch, a tailors tape measure, thread, a seam ripper, regular scissors and pinking shears, and some pins. You'll also need an iron and ironing board, of course.
First, unpackage and iron your shirt;
As you can see, with this regular fit shirt, I have a lot of excess room:
Before you do any sewing, it is important to rip the appropriate seams. If you are taking in a shirt along the side seams and the sleeves, you need to rip the hems at the side seams, and the cuffs like so:
Do this on both sides of the shirt, naturally.
If you already have a dress shirt that fits well, I reccomend simply laying your shirt flat and placing some pins at the measurements you want.to achieve all the way up the side seam and down the arm. Simply subtract equal amounts from each side of the shirt to obtain the 1/2 measurement you need. For example, I like 40" around the chest, so with the shirt buttoned and laying flat I pin it at 20" accross.
For myself, I do 20" at the hips:
18" at the waist:
20" at the chest/armpit to armpit (on this shirt I needed to subtract 1.5" from each side):
7 " at the bicep and 6" at the forearm:
If you don't have a best fitting shirt, have someone pin the shirt while you are wearing it. Leave some fullness as the new seams are going to consume some fabric on each side and it can quicly become too tight:
Once you are happy with the shirt as you've pinned it up you're ready to start sewing. As long as you are folling your pins as a guide it shouldn't matter if you start from the hem or the cuff - you just sew a straight stich all the way from one to the other with your shirt right side out:
Now your shirt looks like this:
Here is what the seam currently looks like:
To make french seams you now need to do the scary part which is cutting off the excess frabric. This is your POINT OF NO RETURN. Cut with your pinking shears (the zig zag scissors) to avoid ravelling of the cloth. Leave a small (1/8") amounts of fabric beyond the seam you've sewn:
Next, to avoid seams that look sloppy I suggest you press open the allowance of fabric with your iron:
Now turn the shirt inside out. You will sew from hem to cuff again with the shirt inside out which will enclose the raw edges of your shirt inside the french seam to further protect the fabric from ravelling:
Keep the first seam on a tight fold and make sure you sew just far enough in to enclose the raw edge:
Now the side seams/sleeves are nicely and cleanly finished. The last step is to resew your hem and cuffs. Go back to your ironing board and roll and press the bem back into it's original shape, then sew:
Iron in a hard crease on the hem.
Sew it.
Now lay the end the sleeve back between the cuff. Make sure it is properaly alligned so that you catch all 3 layers as you sew along the very edge to match the original seam:
Make sure you snip off all those loose threads:
Try on the shirt to make sure no further adjustments are needed:
Now do the rest of your baggy shirts - practice makes