• Hi, I am the owner and main administrator of Styleforum. If you find the forum useful and fun, please help support it by buying through the posted links on the forum. Our main, very popular sales thread, where the latest and best sales are listed, are posted HERE

    Purchases made through some of our links earns a commission for the forum and allows us to do the work of maintaining and improving it. Finally, thanks for being a part of this community. We realize that there are many choices today on the internet, and we have all of you to thank for making Styleforum the foremost destination for discussions of menswear.
  • This site contains affiliate links for which Styleforum may be compensated.
  • STYLE. COMMUNITY. GREAT CLOTHING.

    Bored of counting likes on social networks? At Styleforum, you’ll find rousing discussions that go beyond strings of emojis.

    Click Here to join Styleforum's thousands of style enthusiasts today!

    Styleforum is supported in part by commission earning affiliate links sitewide. Please support us by using them. You may learn more here.

Adventures in Dyeing/Antiquing shoes - a preview

NorCal_1

Distinguished Member
Joined
Jul 10, 2007
Messages
1,370
Reaction score
95
hey folks,

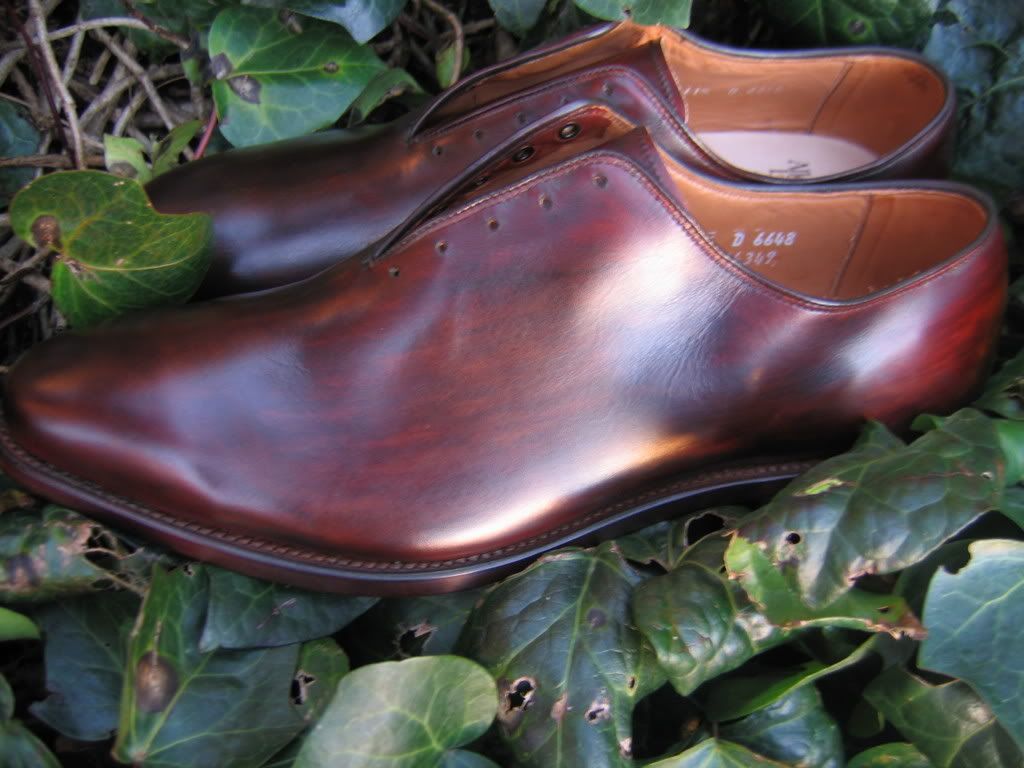
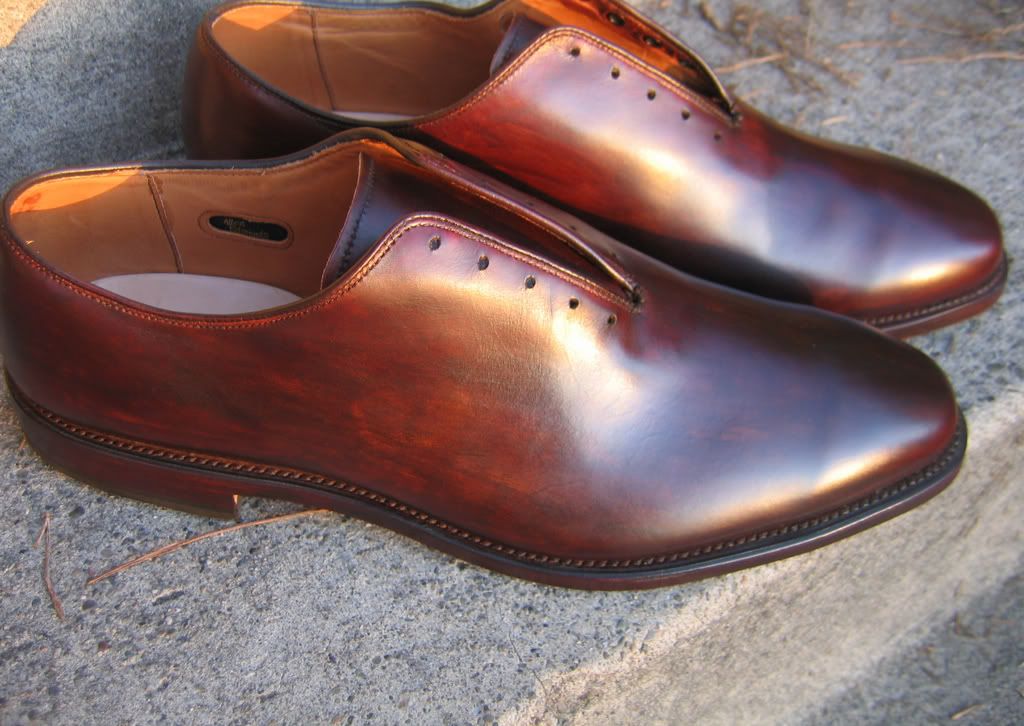
I'm swamped at work this week, so the tutorial I promised on how to dye and antique shoes might be a little slow in coming, but it's for good reason because I learned a few new tricks that I would say are Berluti'esque in the process of dyeing these formerly 'brandy' colored AE Westgate wholecuts into something a lot more attractive (and expensive) looking.

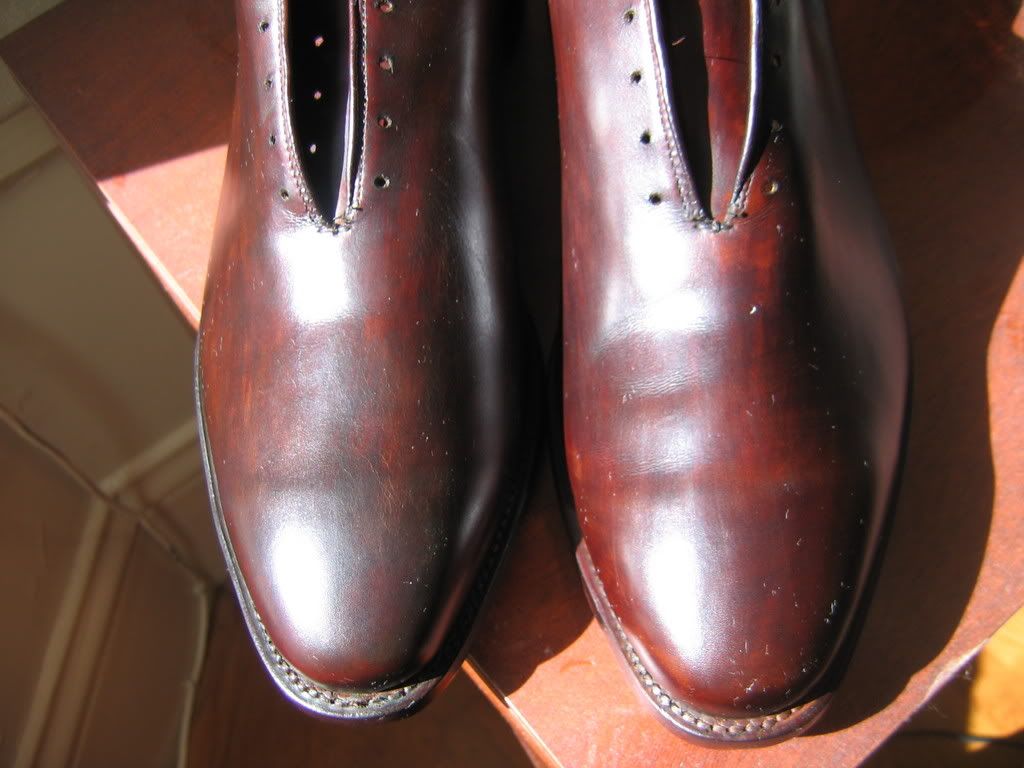
finished result (see the wood effect): not bad, eh...


IMG_5230.jpg


IMG_5258.jpg


IMG_5295.jpg


IMG_5312.jpg


IMG_5310_2.jpg


[Fixed - remove everything after .jpg and they work - j.]
 

macuser3of5

Distinguished Member
Joined
Apr 27, 2006
Messages
2,526
Reaction score
15
Looks slick! Well done. Also, I just use [ i m g ] and [ / i m g ] (remove spaces) to insert images. Just how I roll.
bigstar[1].gif
 

Eustace Tilley

Timed Out
Timed Out
Joined
Sep 27, 2007
Messages
6,441
Reaction score
324
Beautiful!
 

Kuro

Distinguished Member
Joined
Sep 3, 2007
Messages
2,535
Reaction score
155
Very nice indeed.
icon_gu_b_slayer[1].gif
Looking forward to the full post.
 

Shikar

Distinguished Member
Joined
Aug 12, 2007
Messages
3,062
Reaction score
66
Good evening, I have been anxiously awaiting this tutorial. I think there is more pride in ownership knowing the I am responsible for the finish on my shoes.....so thanks, and awaiting the complete tutorial. We should STICKY THIS!!

Regards, Azam.
 

NOLA1

Senior Member
Joined
Jun 24, 2007
Messages
731
Reaction score
1
I think I might buy a pair of those footjoy shoes on sale for around $80 to try this process on once it is posted.
 

NorCal_1

Distinguished Member
Joined
Jul 10, 2007
Messages
1,370
Reaction score
95
here's a reply to a poster on AA that asked a question about how I did the antiquing that I thought might be worth cross posting here:


<<Originally Posted by Rossini
I do like the overall effect and colour but I am slightly worried that, close up, it betrays exactly how it was done and doesn't really look like regular antiquing. Almost like it needs a good polish to blend the streaks in a little more and get a bit more evenness? But I am willing to be shot down on this! >>


great queston, so let me see if I can explain it

that first picture was shot in direct midday sunlight in order for you to see the light/dark mottling effects (similar to Lobb museum finishes) in the antiquing

Trust me when I tell you that the shoes themselves and the finish are much darker than they appear in that photo, and the antiquing effects have been smoothed out and the shoes polished much more than they appear. It's almost as if I put the shoes under an x-ray machine so that you can see the antiquing part 'lit up'

The Lobb-like mottling effects are the direct result of antiquing techniques using mainly shoe dyes to achieve them. Polish is added as the final step to tie it all together and give it a nice shine, but the polish is icing on the cake, and not the cake. When you use polishes only to antique a shoe, it's impossible to create the depth you see here, because polishes are thick and gloppy substances, whereas paints are thin, dry fast and are easy to layer on top of one another (ie you can see through to the layer beneath it).

To give you an example, take your kids paint set and a white piece of paper and compare what happens to the paper when you layer a series of thin paint brush strokes on top of one another in different directions vs using a thick paint to do the same series of strokes. You can't layer with thick paints because each coat covers the previous so darkly that the original layer gets covered up completely. Whereas if you use a thin paint, each layer creates a 3-D depth effect as it gets added on top of the previous and at the edges. You can see through a thin paint to the layer below very easily. Shoe dyes are thin liquid substances and work the same exact way, whereas shoe polishes are thick and gooey.

How you apply those dyes and how many layers and in what sequence is how you get the Lobb museum effects. And of course, just as white paper makes the best canvas background for layering paints, so too a light colored leather such as tan. If you try to do these techniques on a shoe that's dark brown already, you will still achieve nice results but it won't be anywhere near as stunning as with a tan base leather. You can use bleach to get a dark brown shoe lighter and I would suggest you do this to give it the best possible chance of turning out great.

To smooth it all together at the end, I use one very light swipe of acetone (
blush.gif
) over the entire shoe to blur the edges and blend the finish together.

By accident, I was even able to take one of my shoes and make it look like a real piece of wood, which is what I consider to be the "Holy Grail of Antiquing" that several Italian shoe companies have been able to achieve and one that I've always greatly admired. I might keep the secret of how I did it to myself,,,, then again, I might not ;-)

Btw,,,it took me less than a half hour to go from a plain brandy colored shoe to one fully dyed and antiqued and polished. That's due to experience,,, it will take you about an hour the first time and I suggest you do it slowly to get the best results. Shoe antiquers who use polishes-only can take hours and sometimes days to do their work and still achieve a result that is not durable (polishes flake off over time) and not nearly as deep a patina as those who use dyes. It's one of the reasons why Lobb shoes with a museum finish look so great and age so well. It doesn't rub or flake off with time like polished antiquing jobs do.

I hope this explanation sheds some light on the subject.
 

nmoraitis

Senior Member
Joined
Jun 18, 2006
Messages
947
Reaction score
15
Thanks for posting!
 

grimslade

Stylish Dinosaur
Joined
Mar 31, 2006
Messages
10,806
Reaction score
82
Opaque means the opposite of what you appear to have meant.
 

nerdykarim

Distinguished Member
Joined
Mar 9, 2006
Messages
2,009
Reaction score
79
I think they look great. If I may, I'd love to see a picture taken at a bit more distance that shows how they look away from direct sunlight.

Very nice job
smile.gif
 

Featured Sponsor

How important is full vs half canvas to you for heavier sport jackets?

  • Definitely full canvas only

    Votes: 91 37.8%
  • Half canvas is fine

    Votes: 89 36.9%
  • Really don't care

    Votes: 25 10.4%
  • Depends on fabric

    Votes: 40 16.6%
  • Depends on price

    Votes: 38 15.8%

Forum statistics

Threads
506,830
Messages
10,592,085
Members
224,322
Latest member
davidcameron01
Top