- Joined
- Jul 22, 2006
- Messages
- 2,855
- Reaction score
- 145
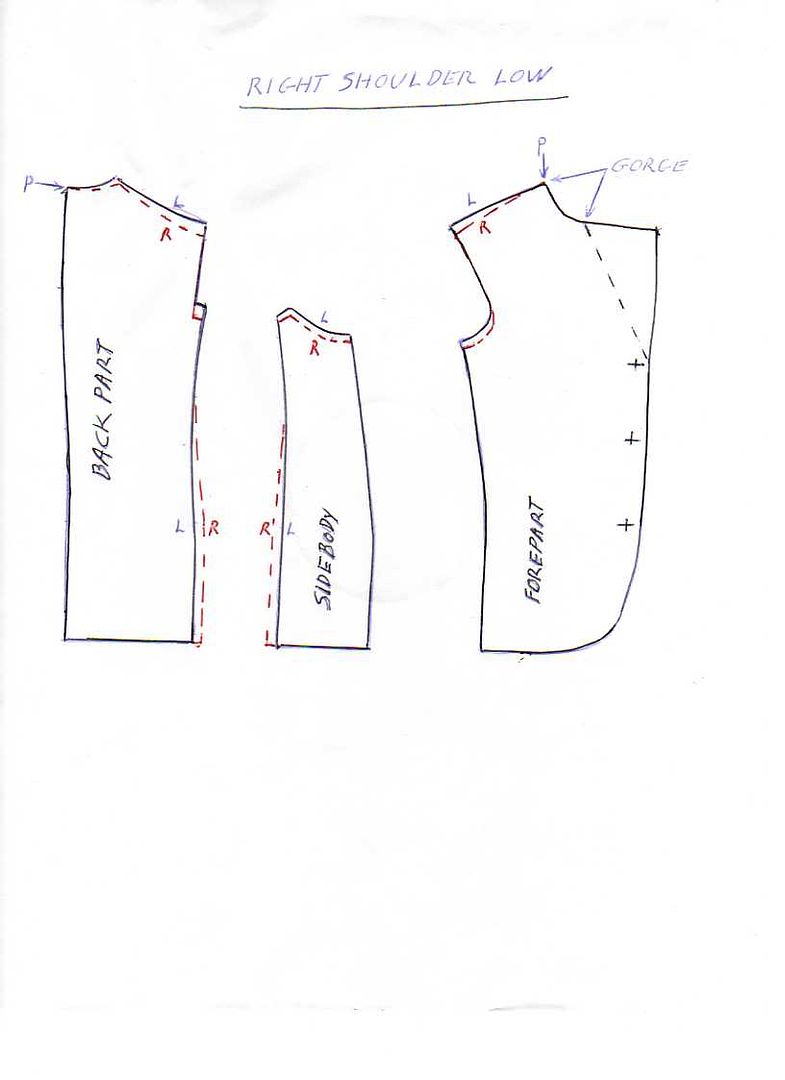
cutting a low shoulder shown are the three main parts of the jacket. the amount to be lowered is determined when the measures are taken. the cloth is cut in two facing layers together giving mirror image right and left sides. the low shoulder is cut in a second step. the points marked p are pivot points. the pattern is placed on the low shoulder side and pivoted down the amount required as shown on the fore and back parts as shown by the dotted lines. note the point sticking up on the back part near the pivot, thats the neck point. see how it drops down. now the pivot point on the forepart drops down the same amount, before using the pivot. the top of the side body drops straight down to match the fore and back parts. you can see that the armhole stays the same . the armhole of the sleeve will not be affected. a person having a low shoulder may have a high/wider hip on the same side. the sides are then increased on the same side . see dotted lines on the back and sidebody. if the hip problem is large the seam between the forepart and side body is also used. the opposite side may be decreased a like amount. when the shoulder is cut this way it avoids those big shoulder pads on one side. the next step in mtm is to make the garment. in custom work it is to make the basted tryon fitting. the gorge question comes up often.and there it is. its the curved portion of the seam that fastens the under collar to the body of the coat on the forepart. raising or lowering the gorge will raise or lower the collar notch/peak.
Last edited: